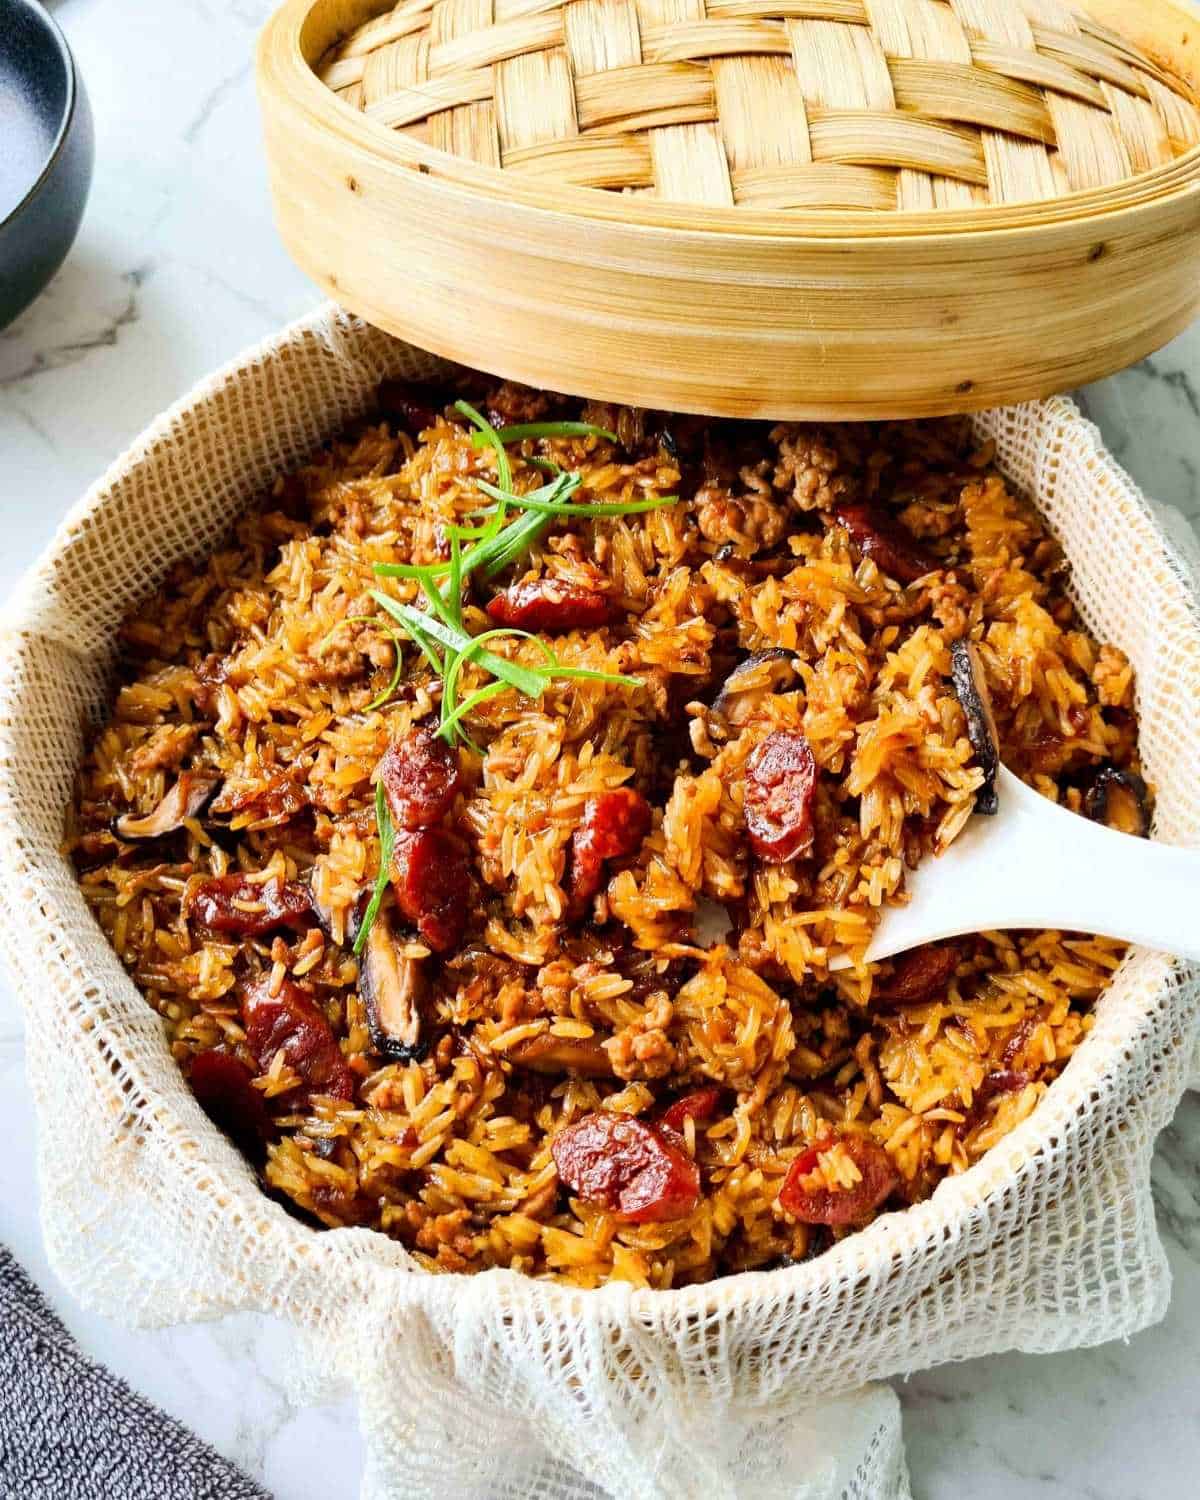
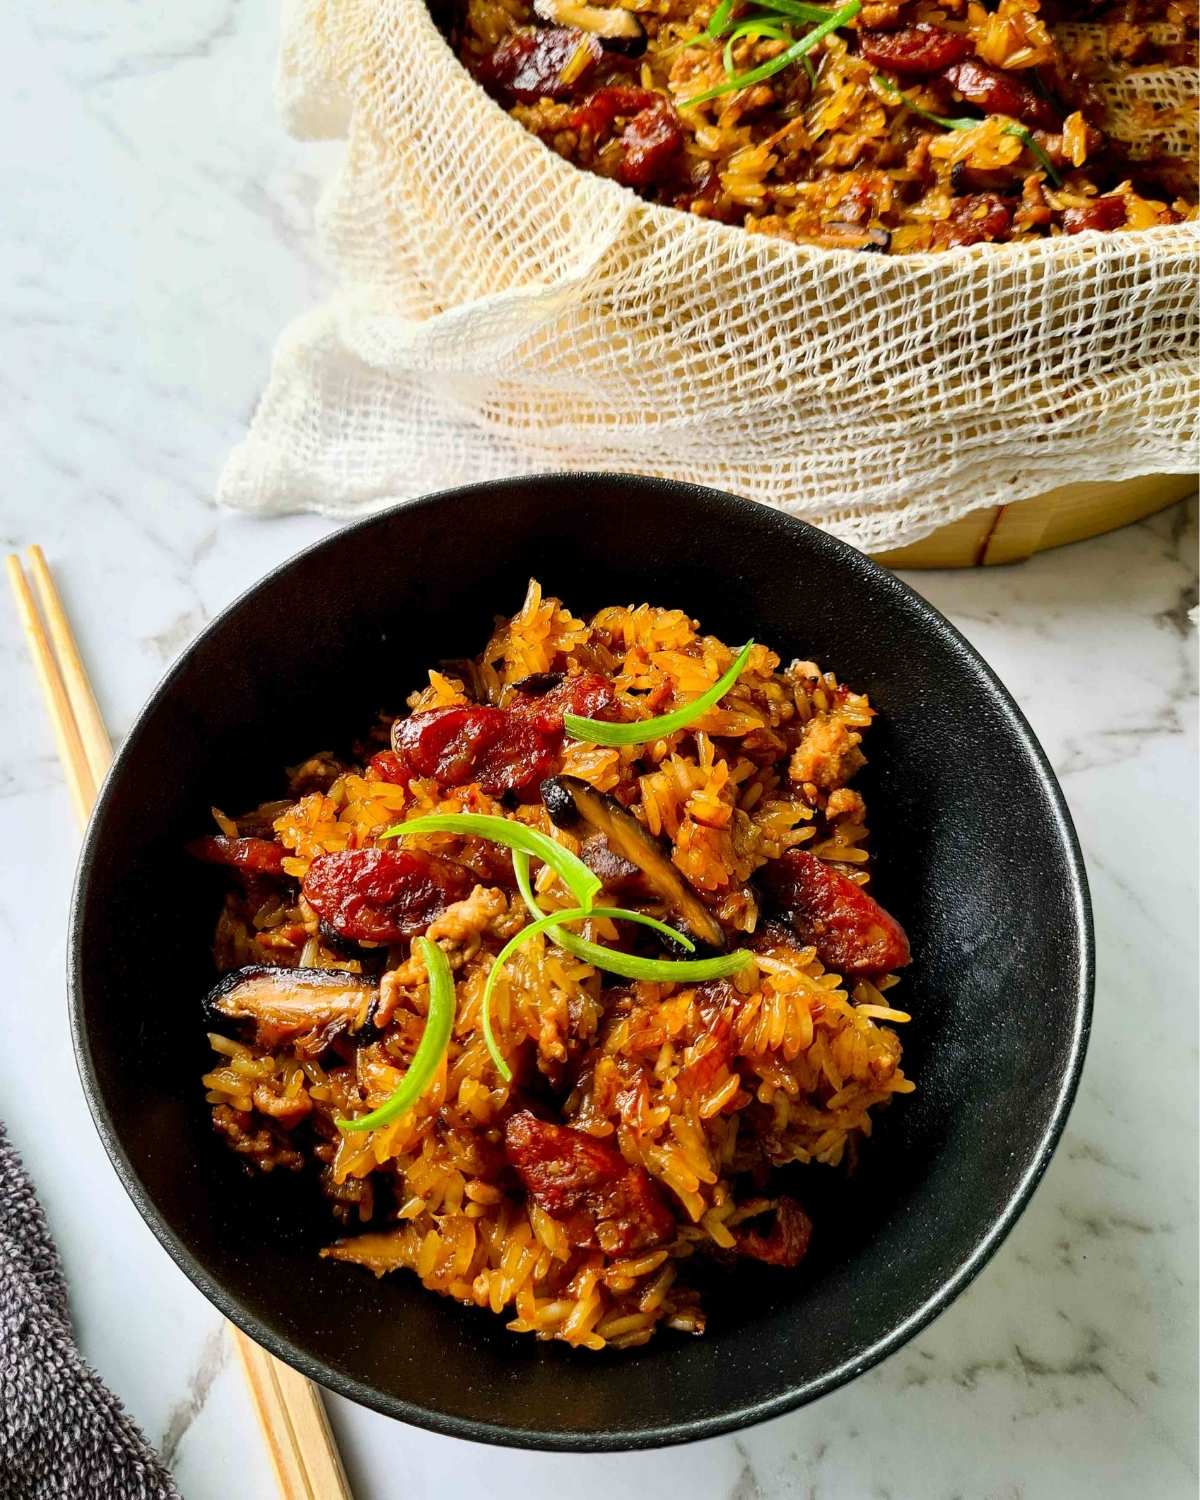
Nuo mi fan (糯米飯) or "savoury sticky rice" is a rich, flavour-packed, aromatic Chinese rice dish using glutinous rice mixed with mouthwatering ingredients. Highlight (umami powerhouse) ingredients: shiitake mushrooms, Chinese sausages (lap cheong), dried shrimp skin, fried shallots and pork mince.
There are many different variations to making this much-loved dish and this recipe is one I grew up eating and absolutely swear by. This tried and tested recipe is super flavoursome, generous and one worthy of a celebration!
Jump to:
Nuo mi fan
Nuo mi fan (糯米飯) or "savoury sticky rice" is a flavour and umami-rich rice dish that is often served as a side on the meal table along with other meat and vegetable dishes. It is also commonly called "you fan" (油飯) which literally translates to oily rice due to its glossy appearance and higher oil content than just normal steamed rice.
In Taiwan, traditionally, this dish is usually only made on special occasions such as Lunar New Year as it requires time, effort and uses lots of flavour rich ingredients. But don't worry, it's not hard at all! You just need to know how and I'll walk you through every step of the way.
You'll also find Cantonese variations at dim sum (aka yum cha) which is called "lo mai fan" being the Cantonese pronunciation of the same name. The Cantonese lo mai gai is usually wrapped in lotus leaves, served in small parcels and much softer in texture.
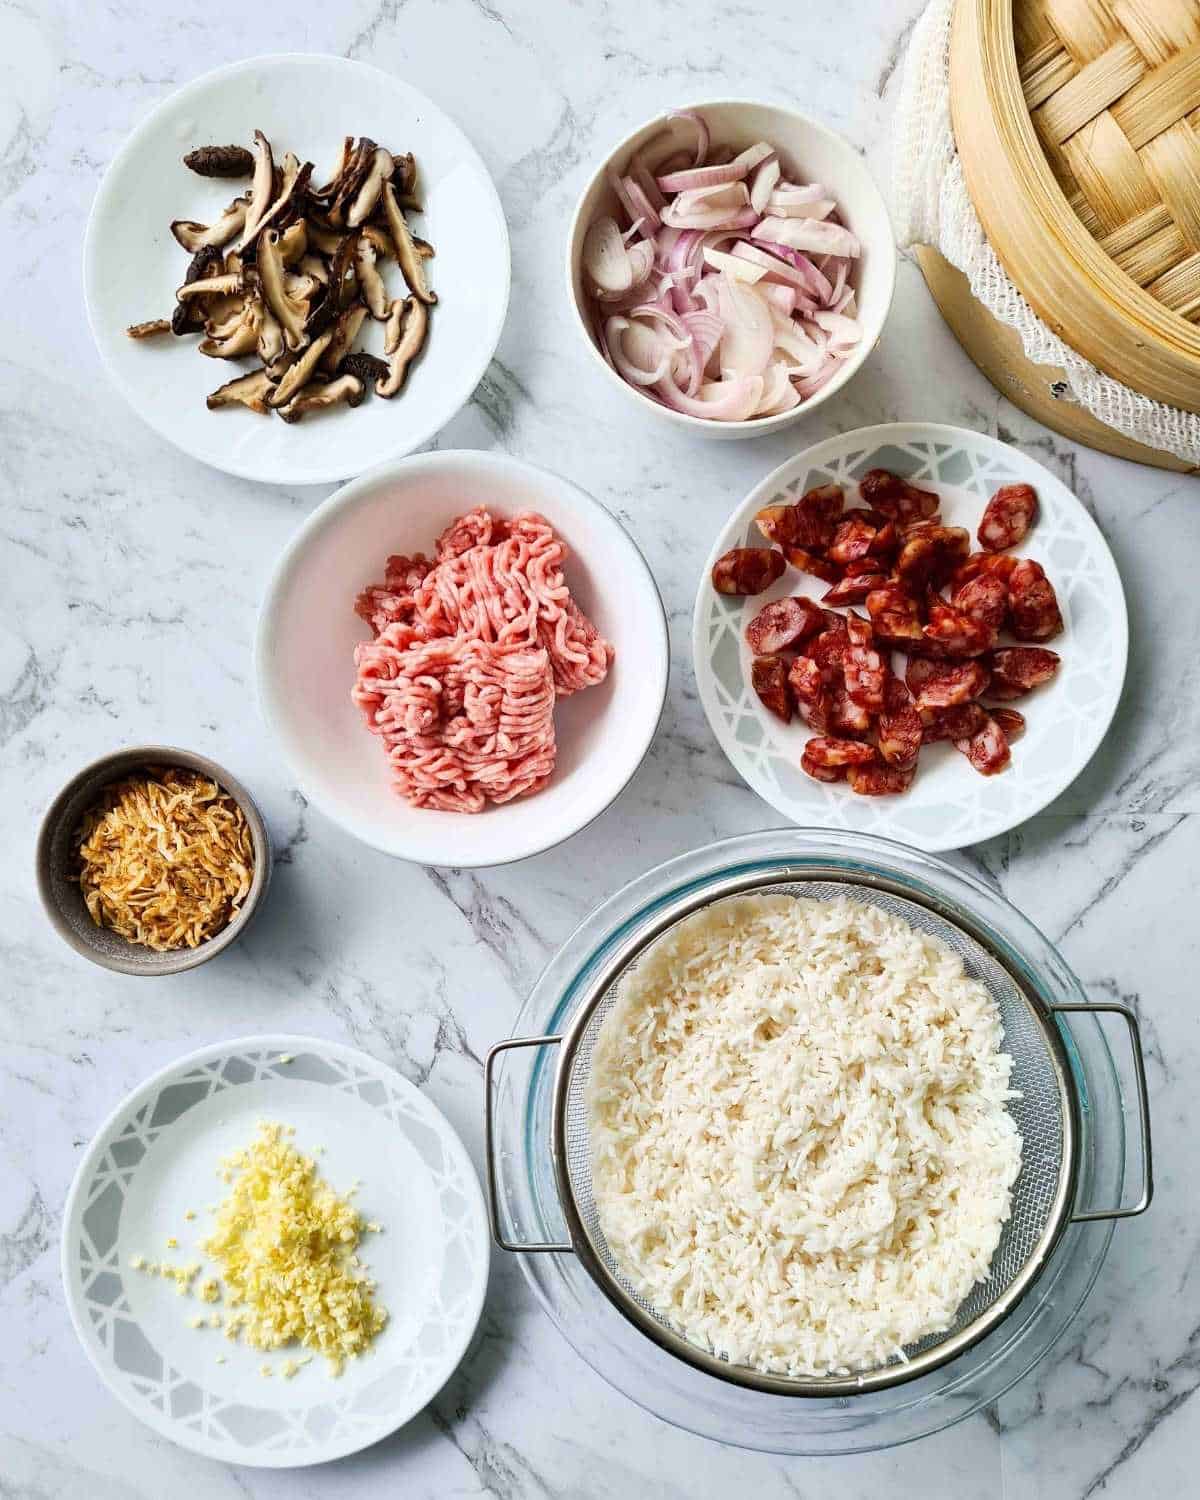
Ingredients
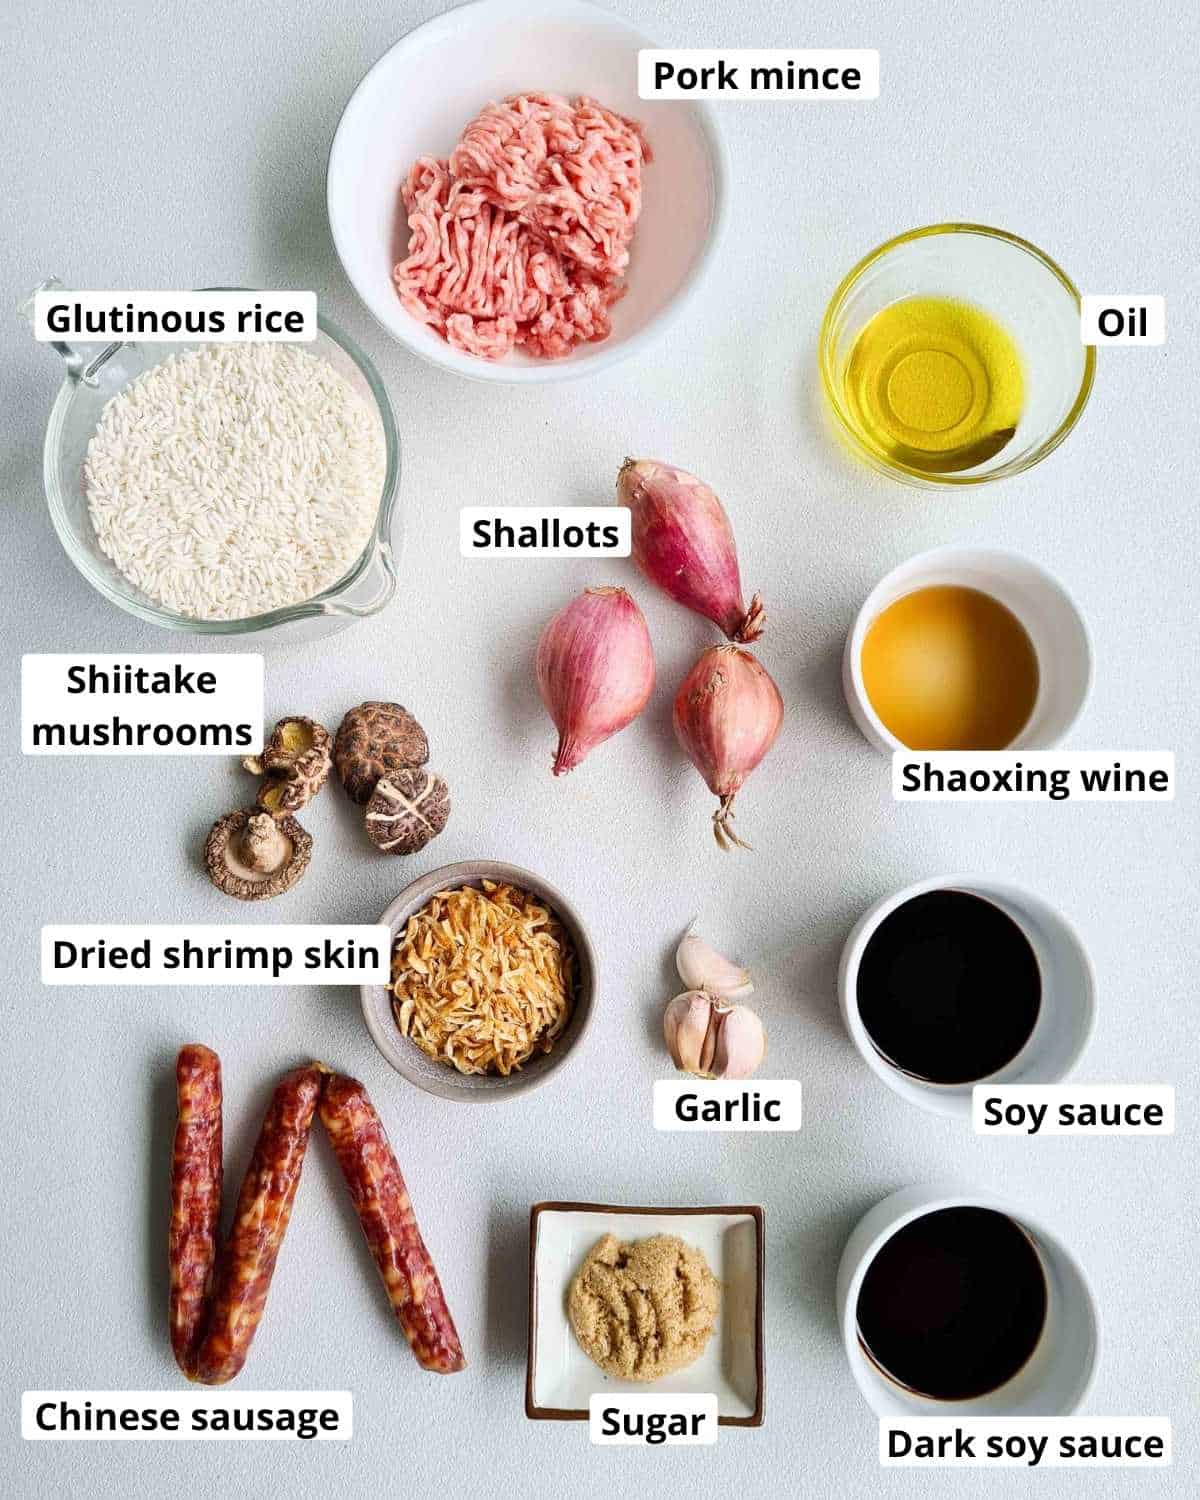
- Glutinous rice - also referred to as "sticky rice" as the rice sticks together once cooked and have a delightfully chewy texture. Unlike the normal rice, glutinous rice needs to be soaked before cooking otherwise it will not cook properly and turn out raw/crunchy-ish. The longer this rice is soaked, the softer it becomes once cooked. Available at Asian supermarkets.
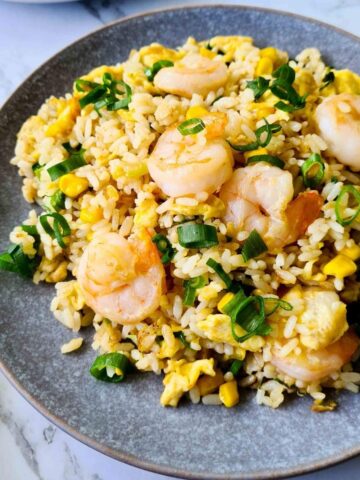
- Chinese sausages - aka "lap cheong" are super aromatic, flavourful thin dried cured fatty pork sausages. It adds a tonne of umami flavour and is a key ingredient to this recipe! Extremely versatile and can be added to anything from stir-fries to braises and rice like my Chinese sausage fried rice, etc. Available at Asian supermarkets and if you're in Australia, some Coles and Woolies also stock these!
- Dried shiitake mushrooms - opt for dried and rehydrate as it is much more flavourful than the fresh version.
- Dried shrimp skin (xia pi 蝦皮) - teeny tiny whole shrimp skin (or shells) that's been sun-dried and have a very rich umami flavour profile. Fantastic in soups, stir-fries and this savoury sticky rice recipe! Available at Asian supermarkets. To learn more about dried shrimp skins and their uses, I go into more detail in my Taiwanese Vermicelli Stir Fry where this ingredient is also used to enhance a simple noodle stir fry.
- Pork mince - Opt for lean pork mince as the Chinese sausages are already very fatty and more oil is used in the cooking process. However, only a small amount is used in this recipe so it's no deal-breaker if you use fatty pork.
Cooking instructions
There are 3 key steps to making this nuo mi fan:
- Prepare the ingredients - get everything ready, at your fingertips before you begin cooking.
- Stir-frying - wake the ingredients up, get them all aromatic.
- Steam - where the magic happens, the rice takes on the flavours of the other ingredients and become super delicious!
Prepare the ingredients
The first thing to do is soak the glutinous rice. Before soaking, rinse (or wash) the rice 2 to 3 times gently. Then, in a large bowl, cover the rice with cold water, enough so that it rises roughly 6 cm/2 inches above the rice.
The ideal soak time for this recipe is 3 hours so that the rice has a lovely chewy texture. If you prefer softer textured sticky rice, soak for no longer than 24 hours. The longer the soak time, the softer the rice becomes.
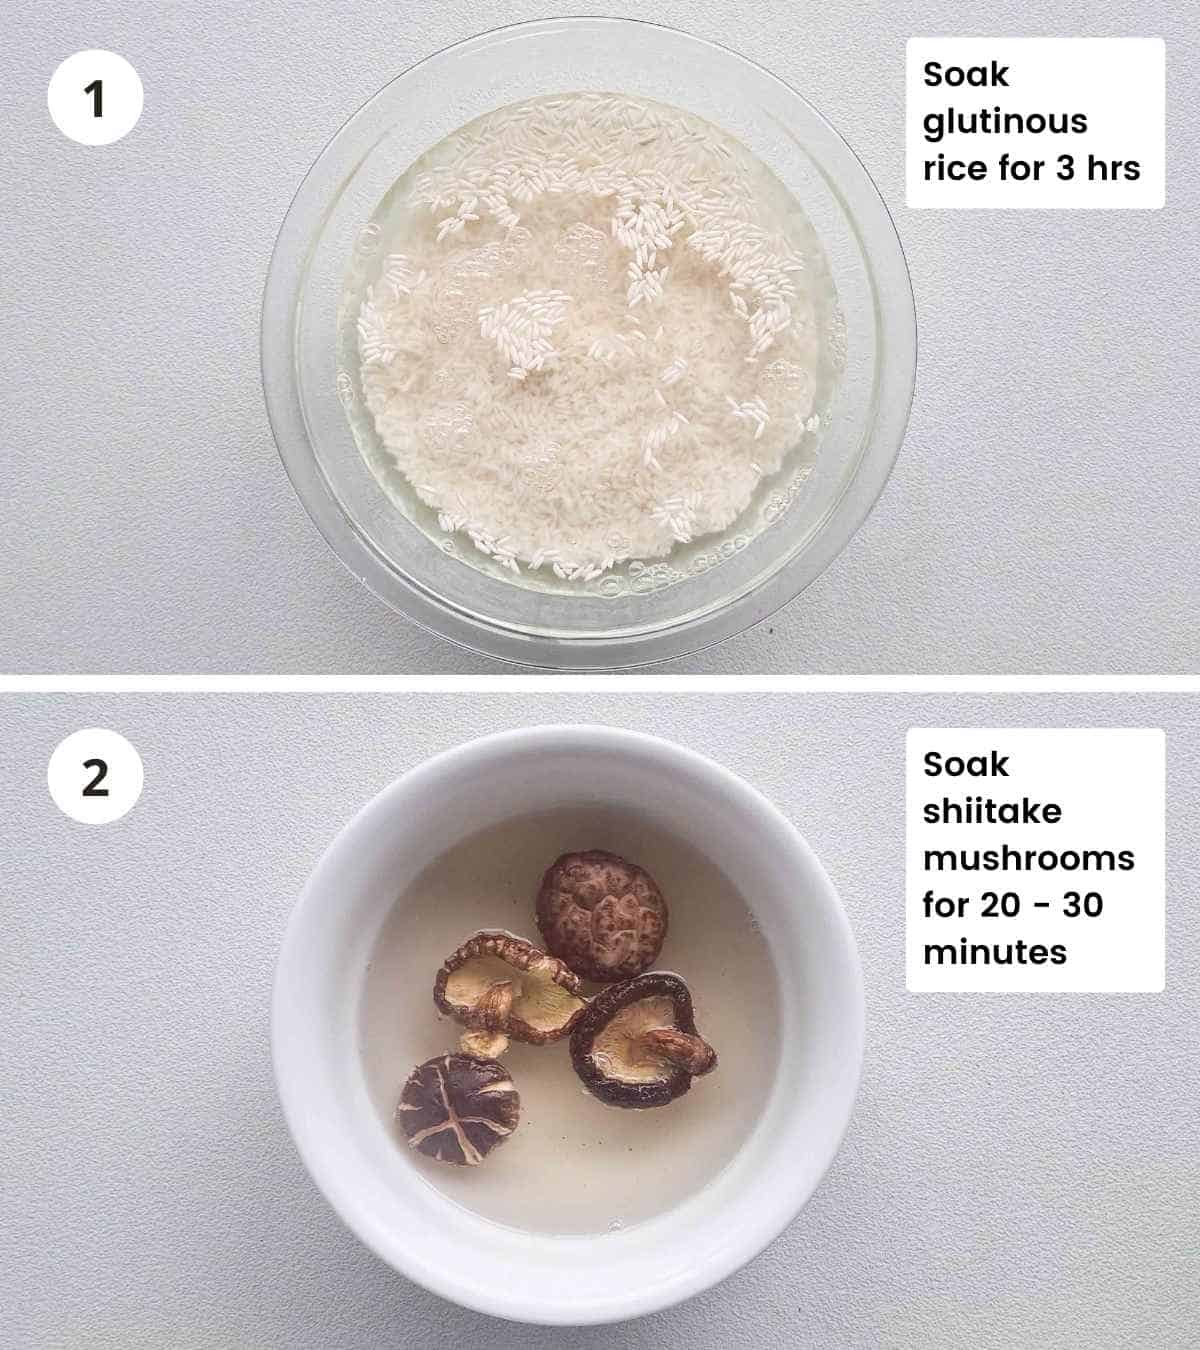
Whilst the rice is soaking, rehydrate the shiitake mushrooms by using ~1 cup of hot kettle boiled water. Cover with either a small plate or a cling film (plastic) for 20 to 30 minutes. Once rehydrated, squeeze out excess liquids back into the bowl, cut off and discard the stems then thinly slice.
Important: retain the shiitake soaking water! It is full of rich umami goodness which will be used later on to make the rice even tastier.
Next, peel the casing off the Chinese sausages (lap cheong). This is an optional step as the casing is edible, however, it does have a slightly tough texture. When used in a dry stir-stir fry such a Chinese Sausage Fried Rice, this step makes a noticable difference to the texture.
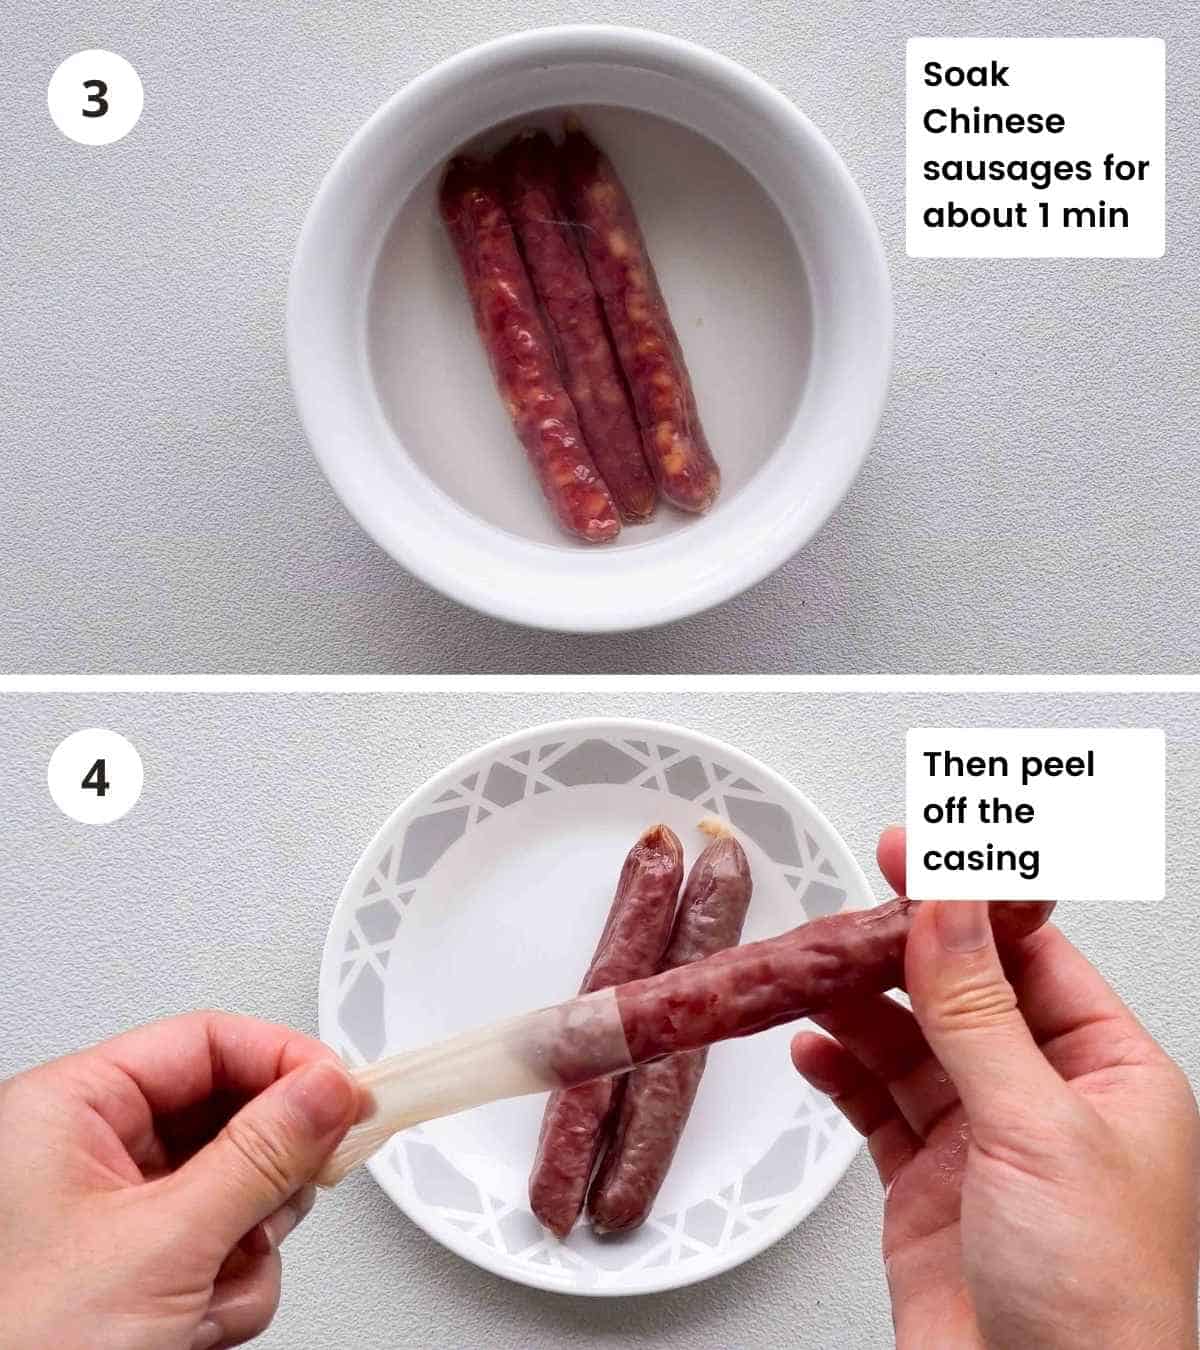
Simply soak the sausages in hot/warm water for about 1 minute to soften the casings then they come right off! Start peeling from one end of the sausage and it'll peel off super easily like the picture above.
Thinly slice the sausages at a slight angle and set them aside.
Once the 3 hours of soaking time is up, drain the glutinous rice. I find it easiest to simply pour into a fine sieve.
Then, have the remaining ingredients ready for the stir-frying step as things will move fast from here on!
Stir fry until aromatic
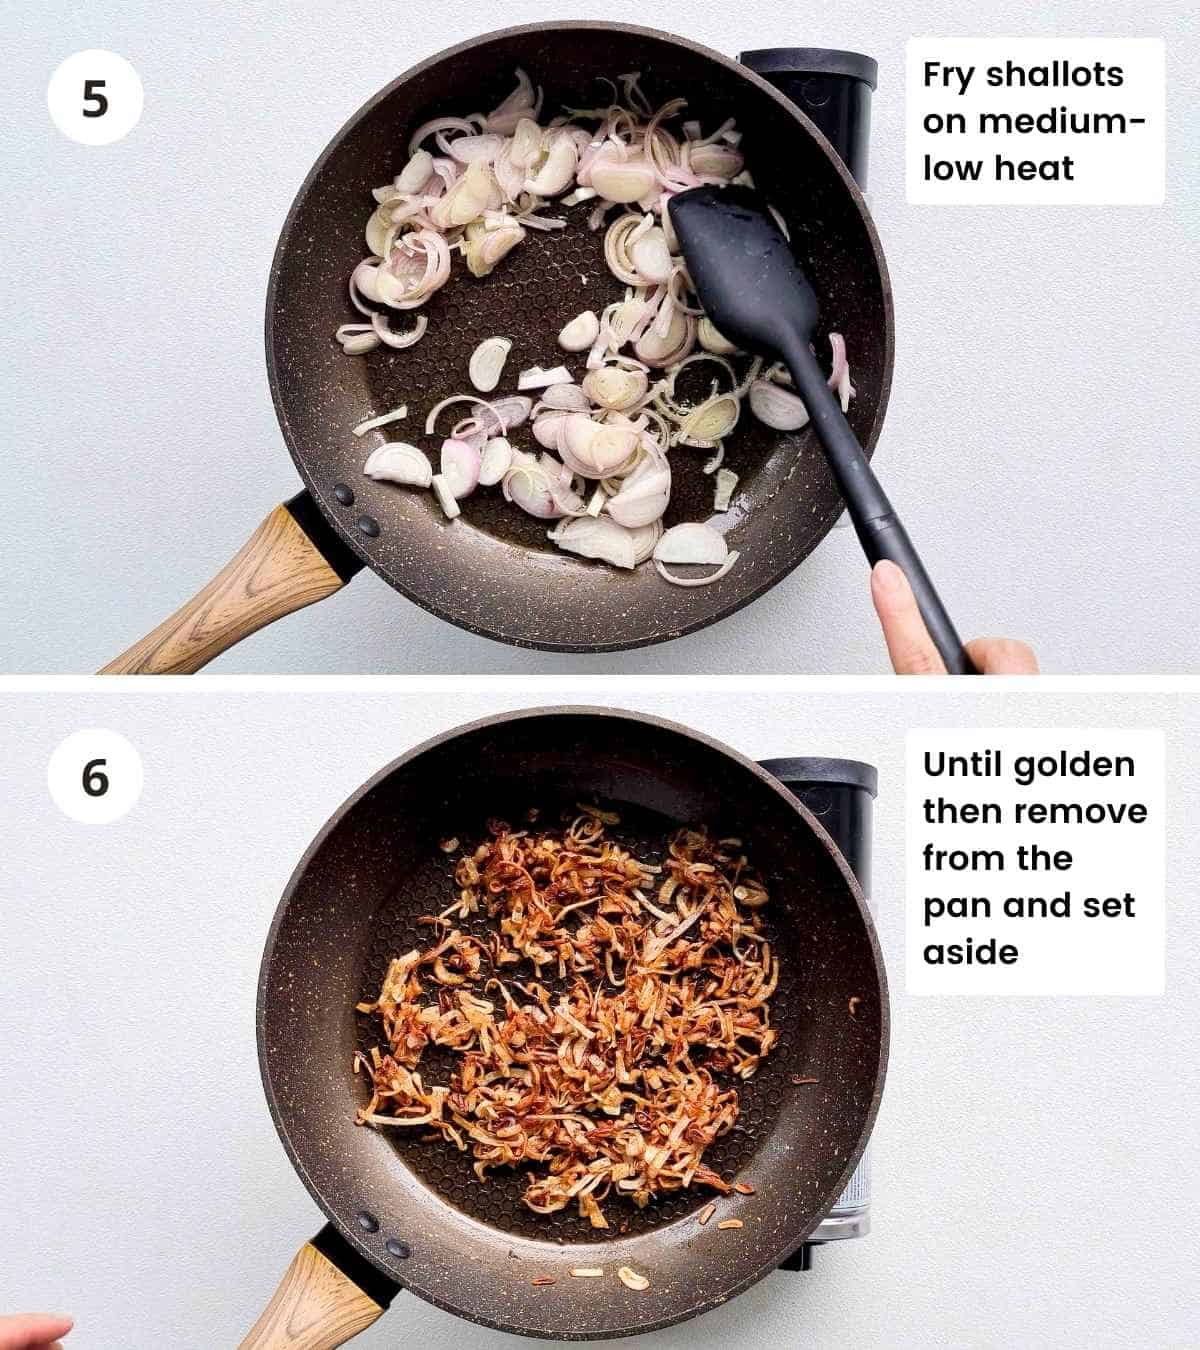
In a large non-stick frying pan or wok, stir fry thinly sliced shallots with some oil on medium-low heat. Do not stop stirring as the shallots can easily burn if left untouched for even just a little while!
I found I needed to reduce the heat down to low about 2 minutes in and stir fry for about 3 more minutes until evenly golden brown. Cooking on high heat will result in uneven colouring of the shallots.
After about 5 minutes, the shallots should be deeply golden and almost crispying. This is when the shallots become truly aromatic! Remove from the pan and set aside.
In the same pan, add thinly sliced shiitake mushrooms and Chinese sausages without any oil on medium heat. No oil is needed here as Chinese sausages are very fatty and the fat will render nicely as you stir fry.
After about 2 minutes, add minced garlic and stir fry for about 1 minute. Then, add half of the fried shallots back into the pan along with pork mince and dried shrimp skin. Stir-fry for about 2 minutes until pork is mostly cooked.
Deglaze with shaoxing wine and once it has reduced by half, stir in soy sauce, dark soy sauce and sugar. Stir-fry for about 30 seconds then add in drained glutinous rice.
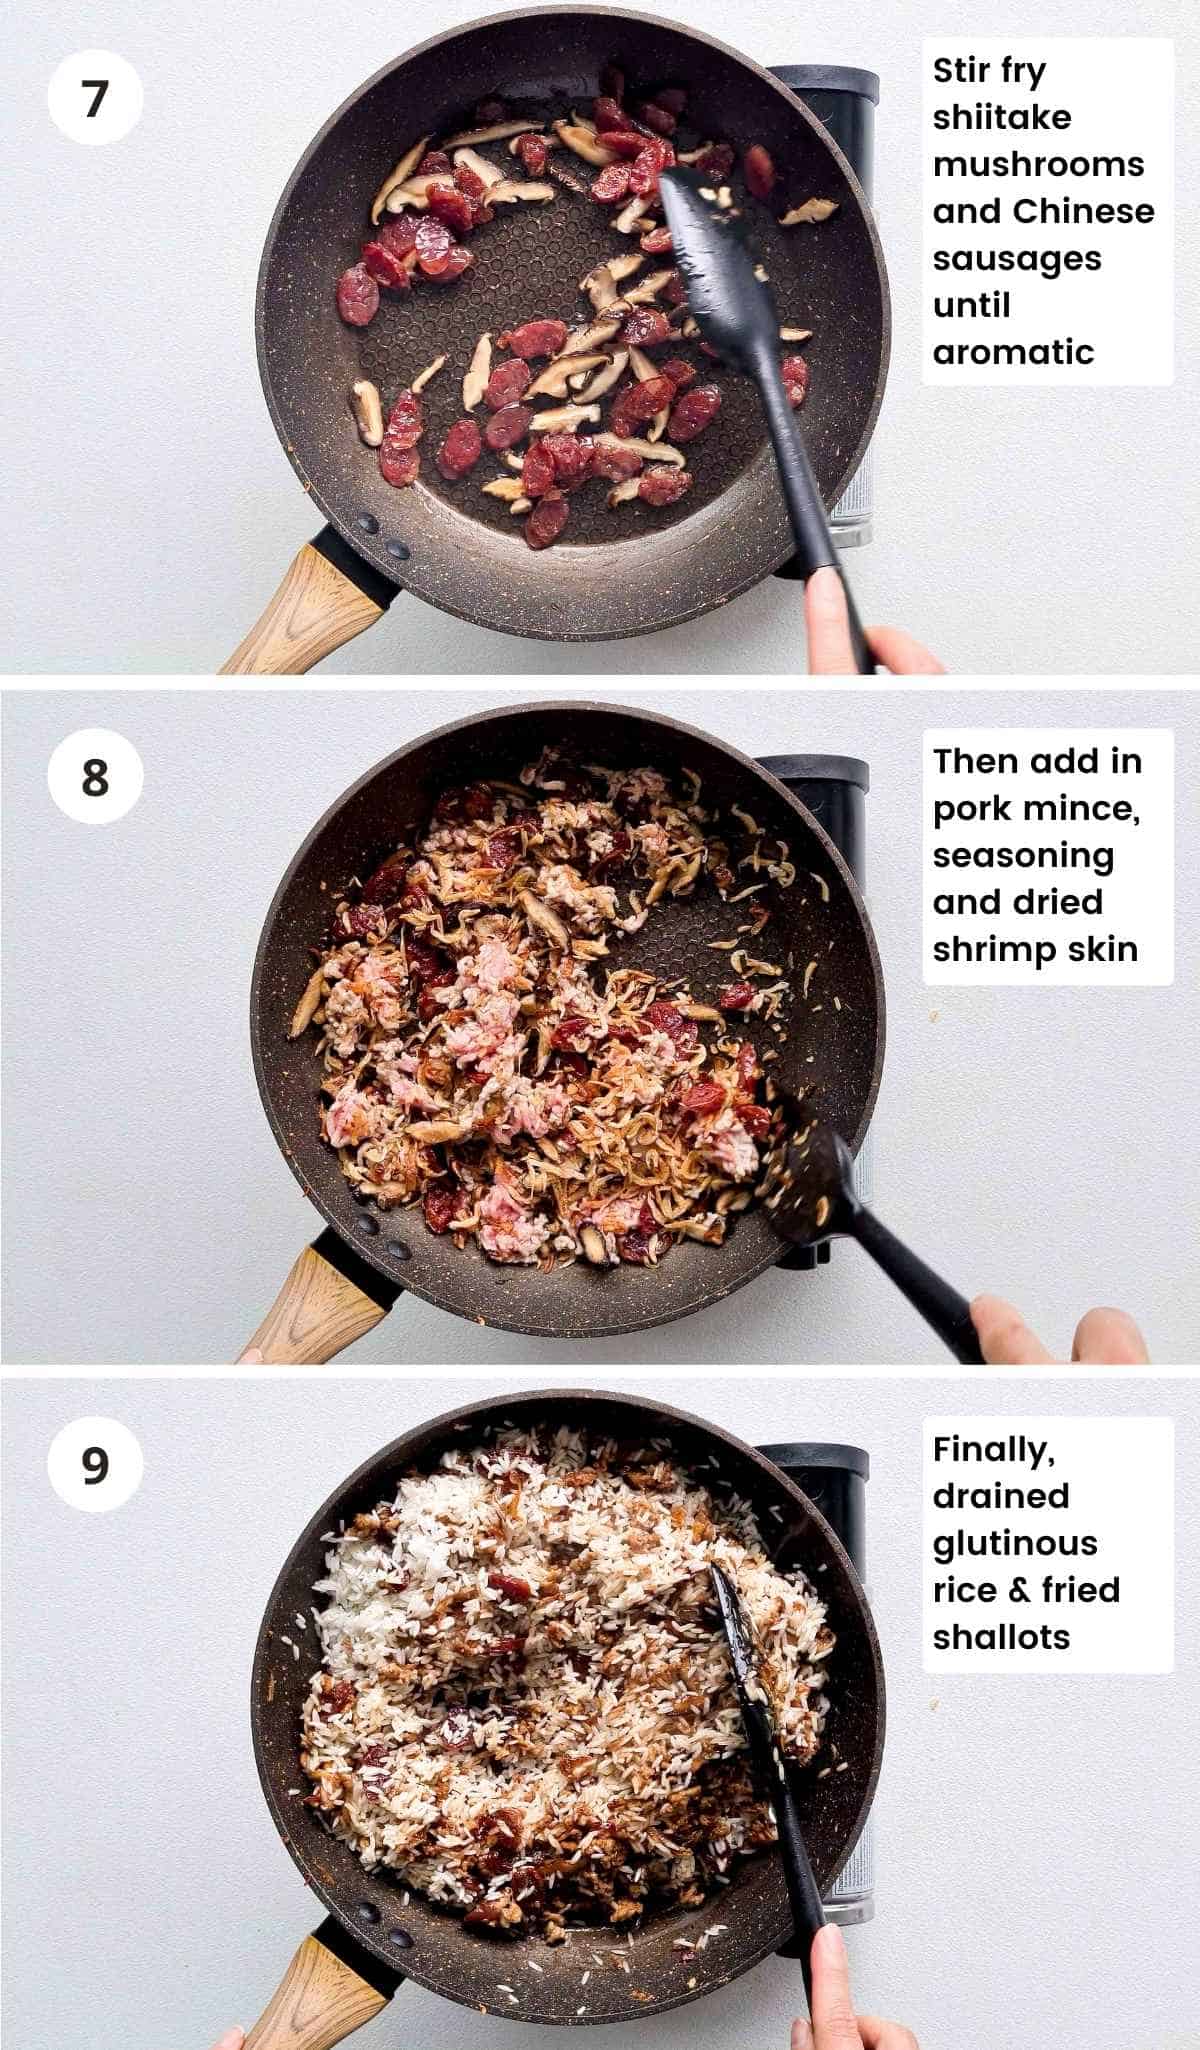
Stir fry the rice mixture for 2 minutes to lightly toast the rice, for a nutty flavour - a trick chefs like to use when making risotto! I also shared this technique in my Chicken and Leek Risotto recipe.
Finally, pour in reserved shiitake mushrooms soaking water and stir into the rice. The rice should absorb this liquid very quickly. Turn the heat off and mix in remaining fried shallots.
Steam
Time to steam! I like to use a bamboo steamer for this as it is perfect for the steam to travel from the bottom up. I used a 26cm / 8.5 inch wide in diameter bamboo steamer and found it was a perfect size.
Line the bamboo steamer with a damp cheesecloth or steamer cloth (I just rinse it under tap water then squeeze out the water). Transfer the sticky rice mixture directly onto the steamer cloth.
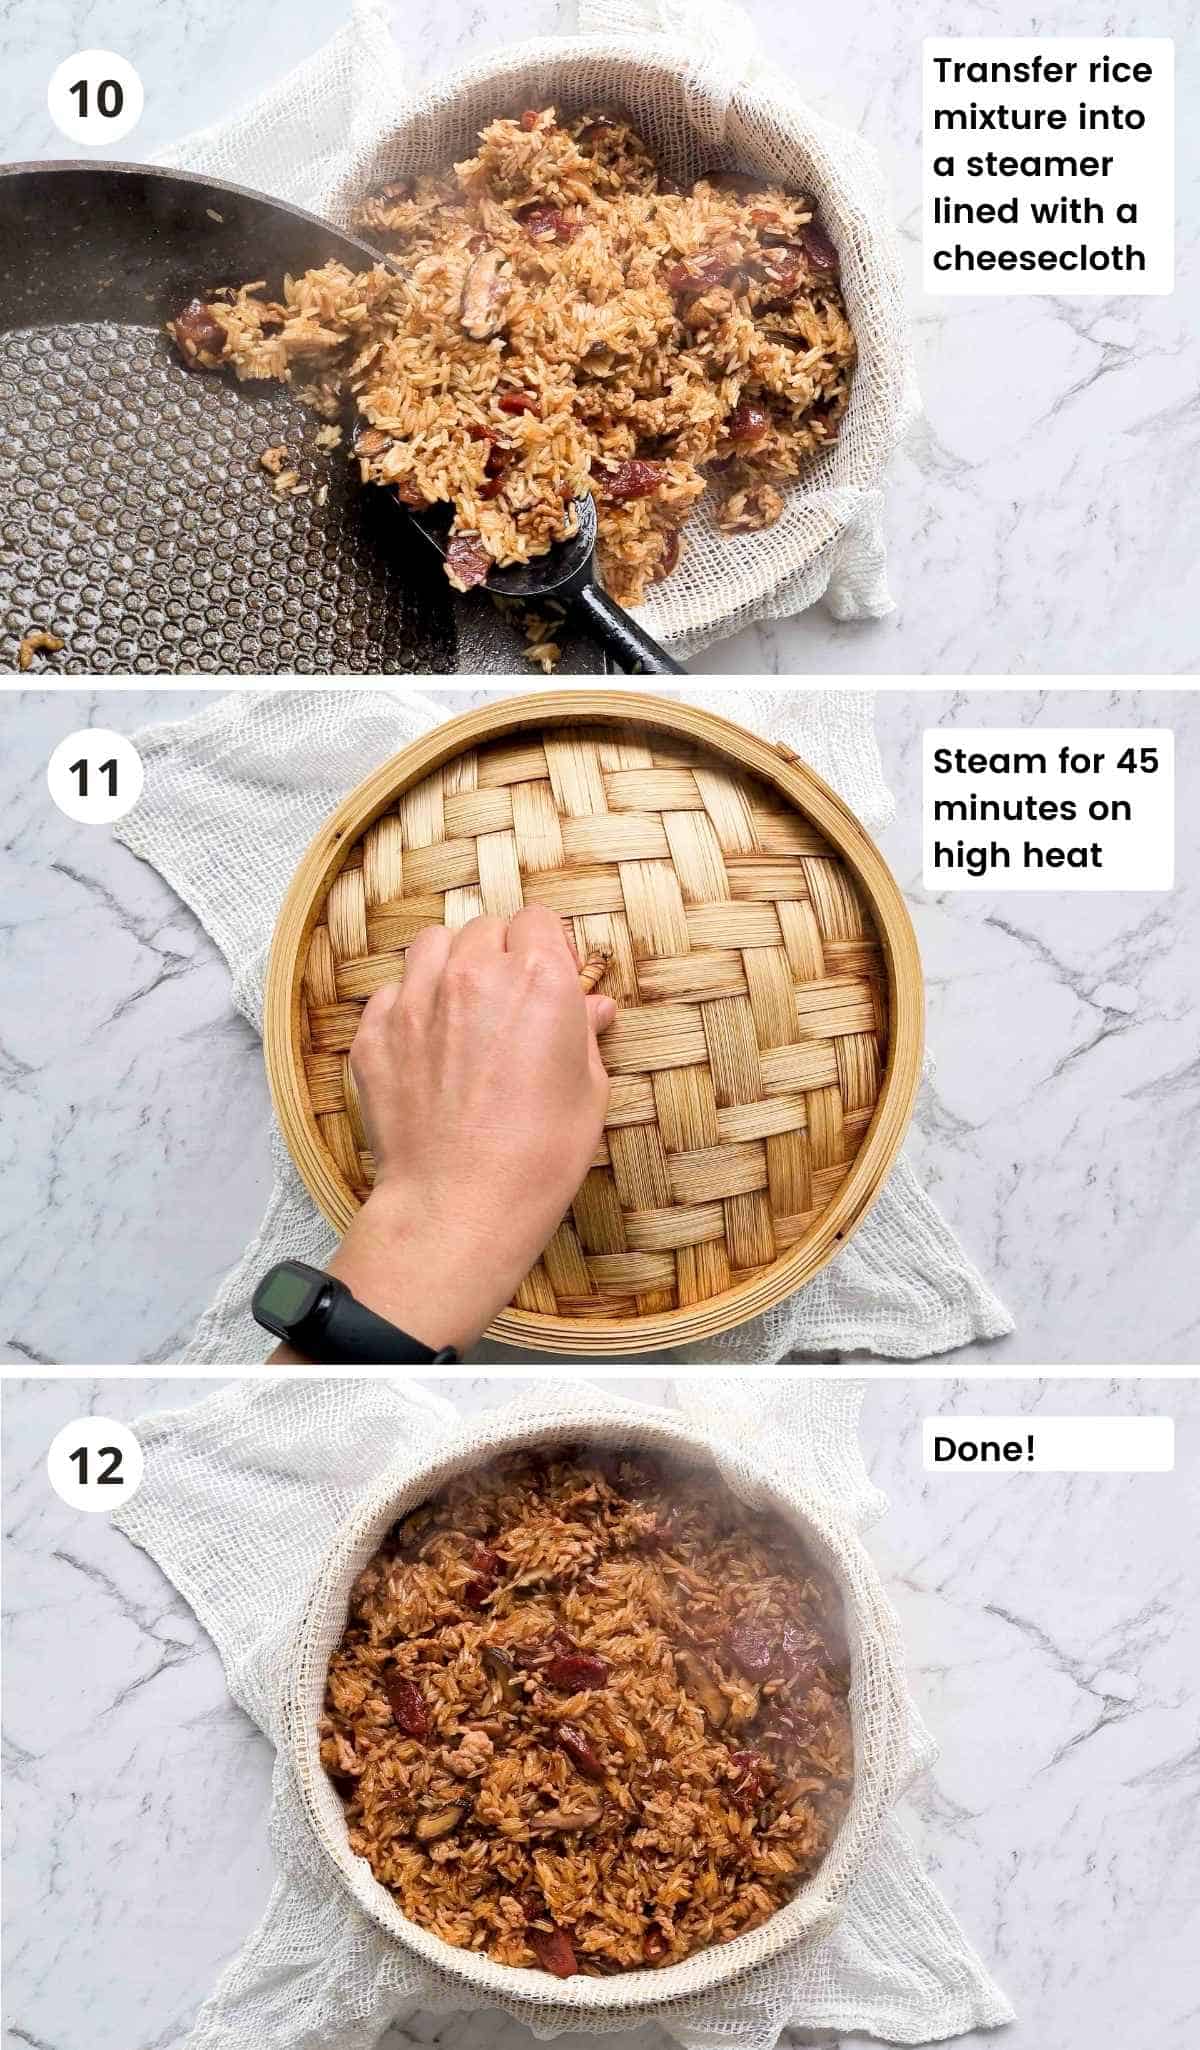
Place the lid on and steam on high heat for 45 minutes undisturbed. That's it!
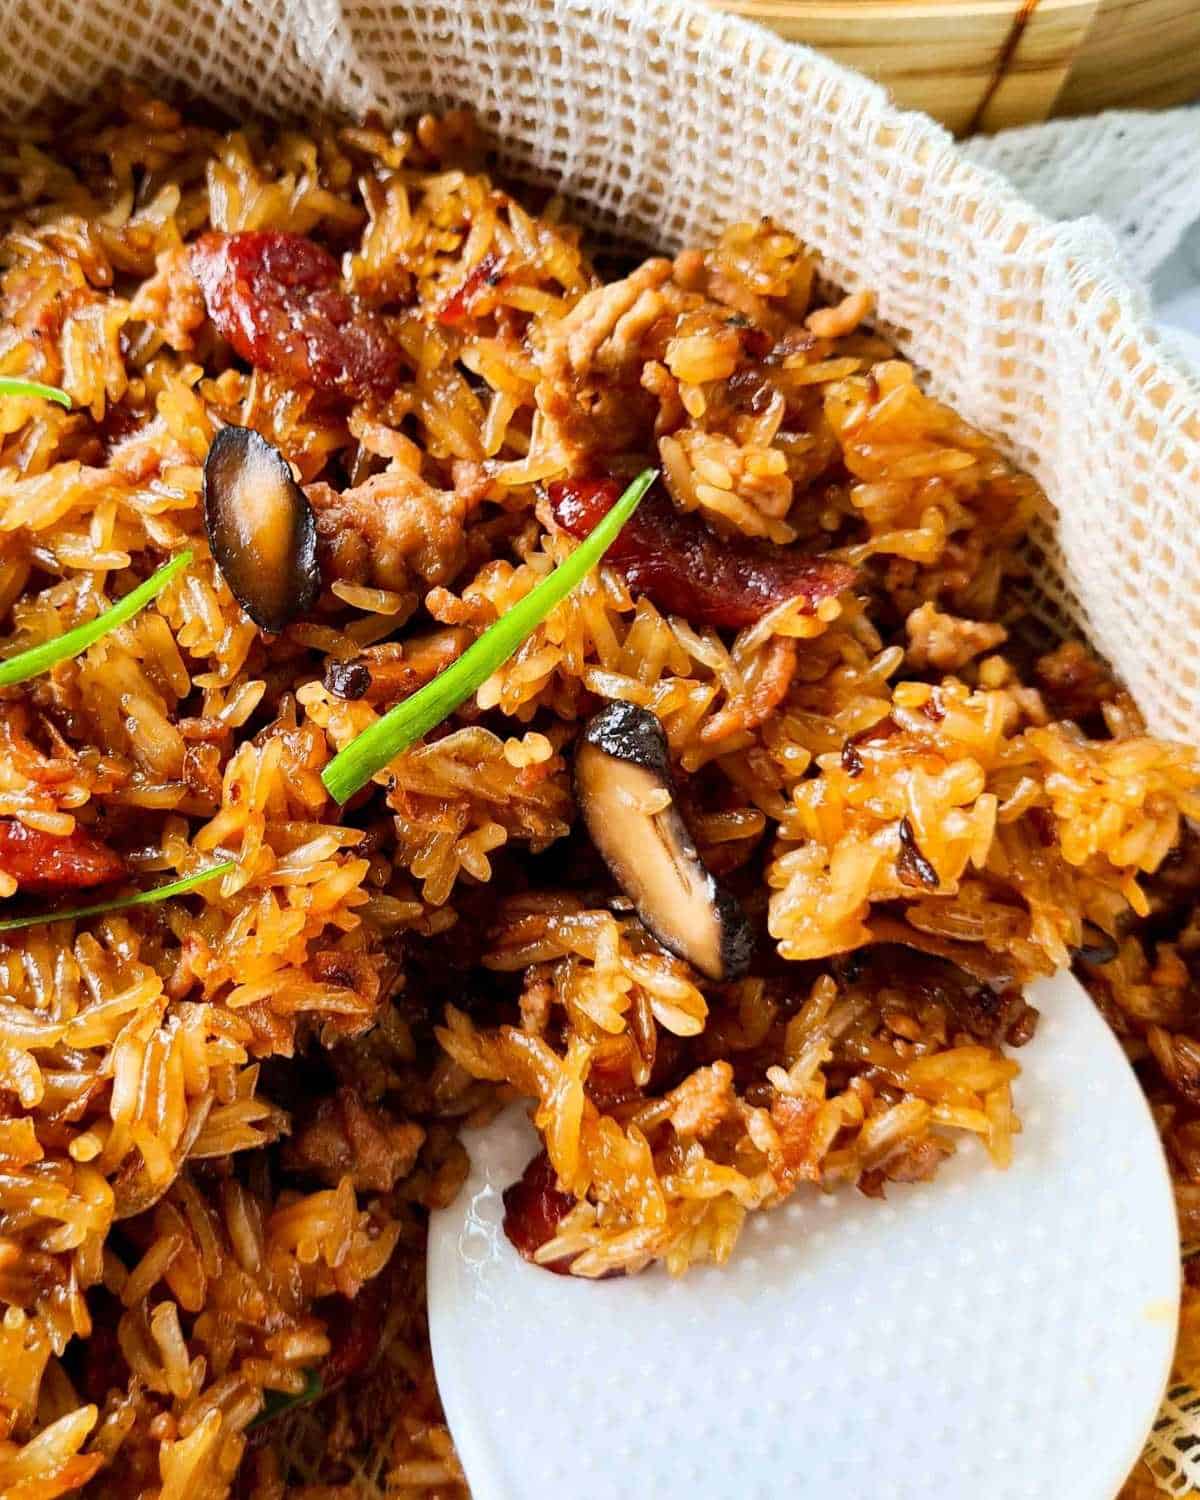
Soaking the rice for 3 hours then steaming for 45 minutes I find is the perfect amount of time to yield the most satisfying rice texture! It should be slightly chewy and never mushy!
Serving suggestions
Nuo mi fan or savoury sticky rice is best served warm/hot! That's when it's the tastiest. I would recommend not eating this cold or worse, straight out of the fridge as the rice would be fairly hard and unpleasant to eat.
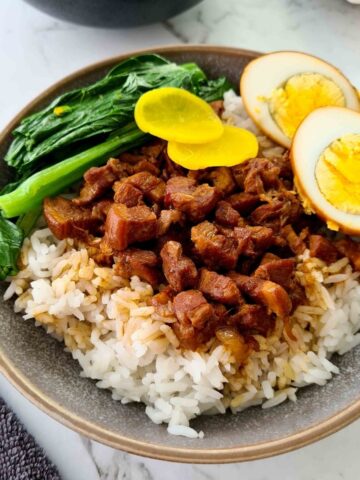
As I mentioned earlier up above, nuo mi fan is generally served as a side dish like Cantonese Pan Fried Noodles or Taiwanese Braised Pork Rice. It's quite rich and by design, to be savoured in small portions.
Recommended dishes to serve with this rice (any or a combination of the below):
- Dumplings - such as Siu Mai (Shumai), Pork and Chive Dumplings or Har Gow (Crystal Prawn Dumplings).
- Meat or seafood dishes - such as Chinese Cashew Chicken, Ginger and Spring Onion Steamed Fish or Beef with Black Bean Sauce.
- Vegetarian dishes (something light) - Chinese Broccoli with Oyster Sauce or simply sauteed Asian greens such as bok choy, choy sum, or even spinach!

Tips for making the best nuo mi fan
- Soak the glutinous rice no longer than 24 hours - the longer you soak the rice, the softer it becomes. 3 hours if you like tender with a slightly chewy texture (the ideal texture), 12 hours for soft rice. Past 24 hours will make the rice mushy and not great to eat.
- Soak the glutinous rice with cold water - cold water gives time for the rice to absorb the water evenly. Soaking with hot water is tricky and can lead to rice being soft on the outside yet hard and grainy on the inside. Stick to cold water for a fool-proof method.
- Get caramelisation on each ingrediens for maximum flavour - stir fry the ingredients in the right order to caramelise and develop complexity. This is particularly important for the shiitake mushrooms and shallots.
Good to know (FAQs)
"Nuo mi" (糯米) is the Chinese pronunciation for glutinous rice. "Fan" means rice.
Nothing! Sticky rice (glutinous rice) is the same as what many call "sweet rice". This is because sticky rice actually tastes ever so slightly sweeter than normal white rice, making it fantastic in desserts also.
Leftovers and freezing
Not only does this savoury sticky rice recipe taste amazing, it also freezes really well! Best pack in air-tight containers and will freeze well for up to 2 - 3 months.
In the fridge, this rice will keep well for up to 4 days in airtight containers.
Made this recipe? Let me know your thoughts or questions by dropping a note in the comments section below! I'd love to hear from you. 🙂
If you're active on Instagram, take a picture once you've made this recipe and tag me on Instagram! I'd love to see them!
Happy cooking! - Gen
📖 Recipe

Nuo Mi Fan (Chinese Sticky Rice)
Equipment
- Steamer (ideally a large bamboo steamer)
- Steamer cloth (cheesecloth)
Ingredients
- 2 cups glutinous rice aka sticky rice
- 3 Chinese sausages aka lap cheong
- 200 g / 7 ounces pork mince ideally lean (note 1)
- 4 dried shiitake mushrooms
- 3 tablespoon dried shrimp skin
- 4 bulbs shallots thinly sliced
- 4 cloves garlic minced
- 2 tablespoon neutral tasting oil
Seasoning
- 1 tablespoon soy sauce
- 1 tablespoon dark soy sauce
- 2 tablespoon shaoxing wine
- 1 tablespoon brown sugar
Instructions
Prepare the ingredients
- Rinse the glutinous rice 2 - 3 times. Then, soak the rice in a large bowl with cold water, filled to about 6cm / 2 inches above the rice for 3 hours. (note 2)
- Whilst the rice is soaking, rehydrate the dried shiitake mushrooms for about 20 to 30 minutes with 1 cup of kettle boiled water. Then, squeeze out excess liquids from the rehydrated shiitake mushrooms and thinly slice. Set aside. Reserve shiitake soaking water.
- Soak Chinese sausages with warm/hot water for about 1 minute to soften the casings. Discard the water then peel off the casings. (note 3) Thinly slice sausages vertically, at a slight angle. About ½ cm or ¼ inch thick.
Stir fry - get it aromatic (note 4)
- Once the rice has soaked for 3 hours, drain the rice well (easiest is with a sieve). Set aside.
- In a large non-stick pan or wok, add oil and thinly sliced shallots on medium-low heat. Keep stir-frying until shallots have turned deep golden, lightly crispy and fragrant. About 5 minutes. Remove from the pan and set aside.
- In the same pan, add Chinese sausages and shiitake mushrooms and stir fry on medium heat for about 2 - 3 minutes. Add in minced garlic, stir fry for 1 minute.
- Add half of the golden shallots back into the pan along with pork mince and dried shrimp skin. Turn the heat up to high and stir fry for 2 minutes.
- Deglaze with shaoxing wine, reduce then add in remaining seasoning ingredients. Stir fry for about 30 seconds, caramelising the soy sauces. Add in drained rice, stir fry for 2 minutes then pour in reserved shiitake mushrooms soaking water.
- Reduce heat to medium and stir fry for 1 - 2 minutes until the water has been fully absorbed into the rice. Stir in remaining golden shallots. Turn the heat off.
Steam
- Transfer the rice mixture into a cheesecloth (damp) lined bamboo steamer. I used a 26cm / 8.5 inch wide in diameter bamboo steamer and found it was a perfect size.
- Steam on high heat with the lid on for 45 minutes undisturbed. Serve hot.


TeachMeToCook
Would Calrose Rice Botan work as a substitute for glutinous rice?
Genevieve
Hey there, I've never used this rice for making this recipe before so cannot recommend it unfortunately!
Charlie
First time making any sort of sticky rice dish, they are a favourite of mine at yum cha. This was brilliant, my partner said it tasted like restaurant quality and I agree, the extra details like the dried shrimp and using the mushroom water made it so nice and the texture was spot on with 3 hours soak, 45 minute steam.
Genevieve
Very happy to hear that Charlie, thank you so much 🙂
鍾亞當
By the way, everyone loved it! People were fighting over the leftovers 🙂
Great recipe, Gen.
Genevieve
Yay! Very happy to hear that it was a hit 🙂 Thank you for sharing your experience with this recipe! I appreciate your feedback and have updated the blog part to include when to add in the garlic (which I had missed previously). Under the recipe card section, brown sugar is part of the 'seasoning' ingredients which is to be added at instruction step #8.
鍾亞當
Hi Gen, this recipe looks great. We're celebrating the new year at a friend's house (we're blended Taiwanese family living in New Zealand). Originally I was going to cook the Woks of Life recipe, but yours layers in a few more ingredients and techniques that I can already tell will lead to greater depth of flavor (like the 蝦皮) and more pleasing experience... like the technique of removing the casing from the sausage... these are little things that communicate to me that you know what you're talking about, which isn't always the case with internet recipes, as I'm sure you know!
新年快樂 to you and your family
Genevieve
Thank you so much 亞當! I really appreciate you sharing your thoughts and am very happy that you like the sound of my recipe 🙂 I hope you and and your family have a fantastic new year and 恭喜發財!
鍾亞當
Just loaded the nuomifan into the steamer for transport to my friend's house. Kitchen smells great.
Couple of edits: the "blog" part of the post omits instructions for garlic, and the "recipe" portion omits directions for brown sugar. I had to keep flipping back and forth to get the whole recipe.
Also, especially for Chinese recipes where mise en place is vital asthings cook quickly, it's great when the ingredients list serves as a guide for all the prep work. For example, in the ingredients it can read "4 dried shiitakes, soaked, thinly sliced" or "2 cups glutinous rice, soaked for 3 hours". Then you don't have to dig into the recipe or the blog to find out what to do with them, you have all the info prepped and ready to go. You can always include directions on how to soak dried mushrooms in the notes before the recipe begins.