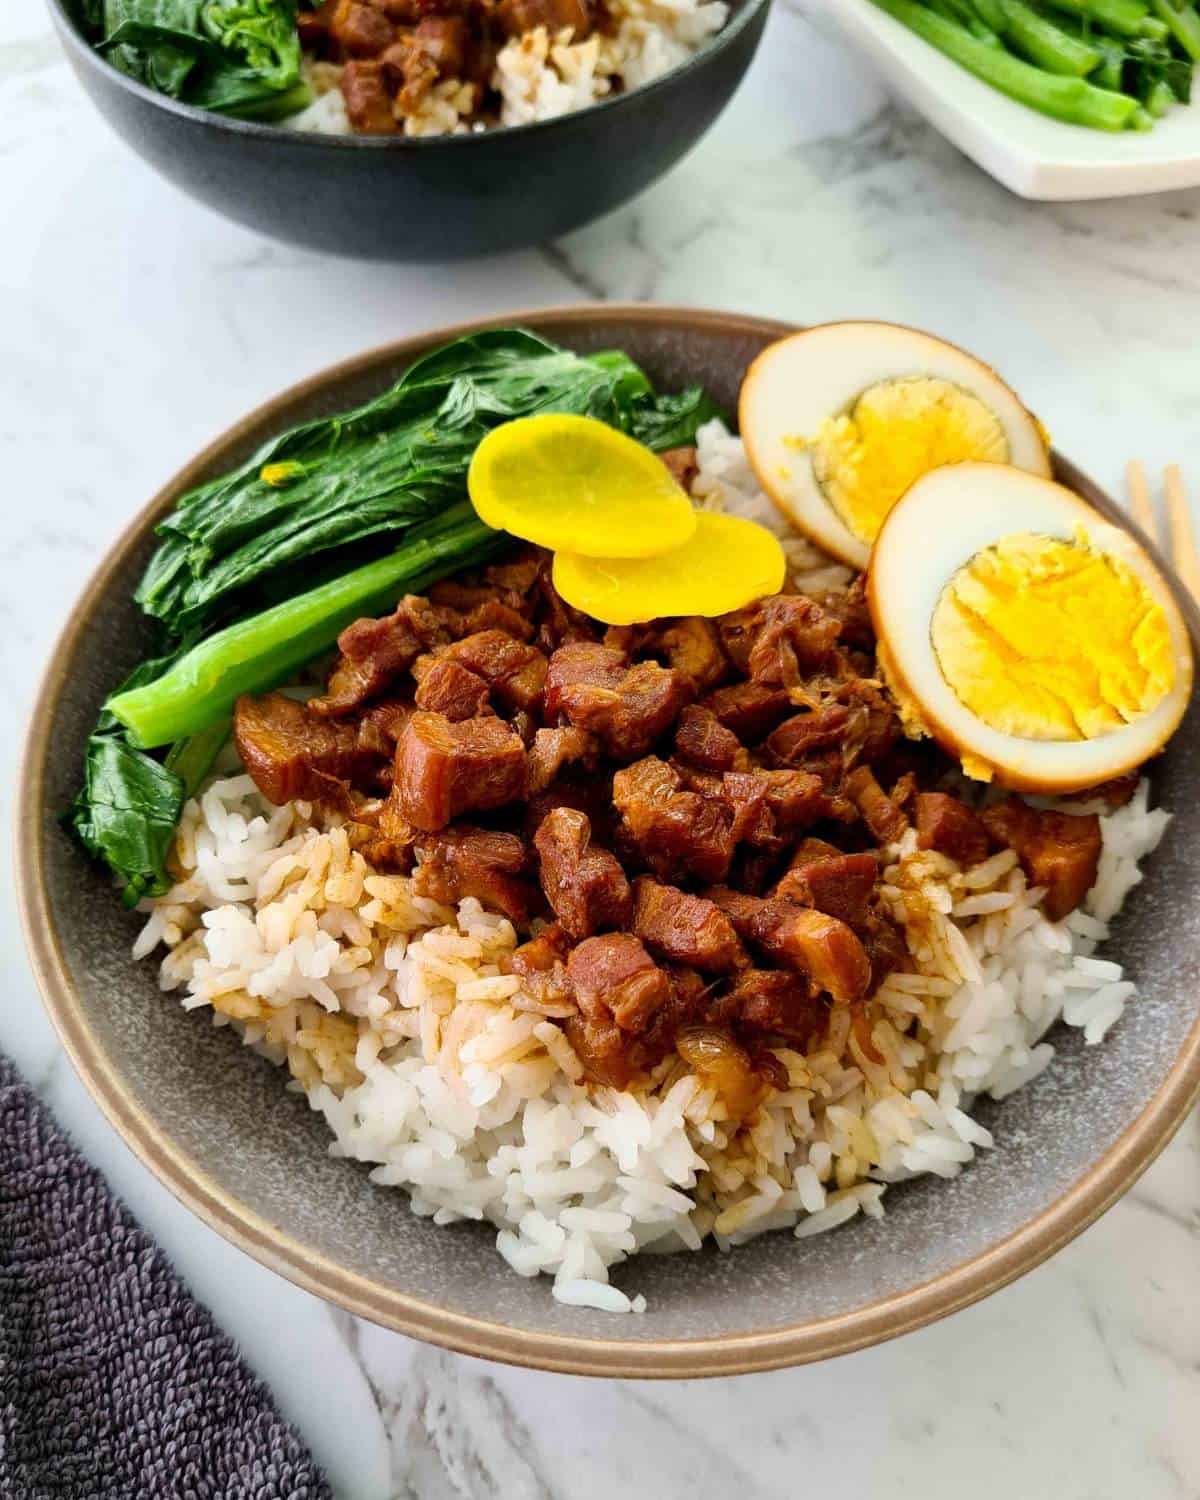
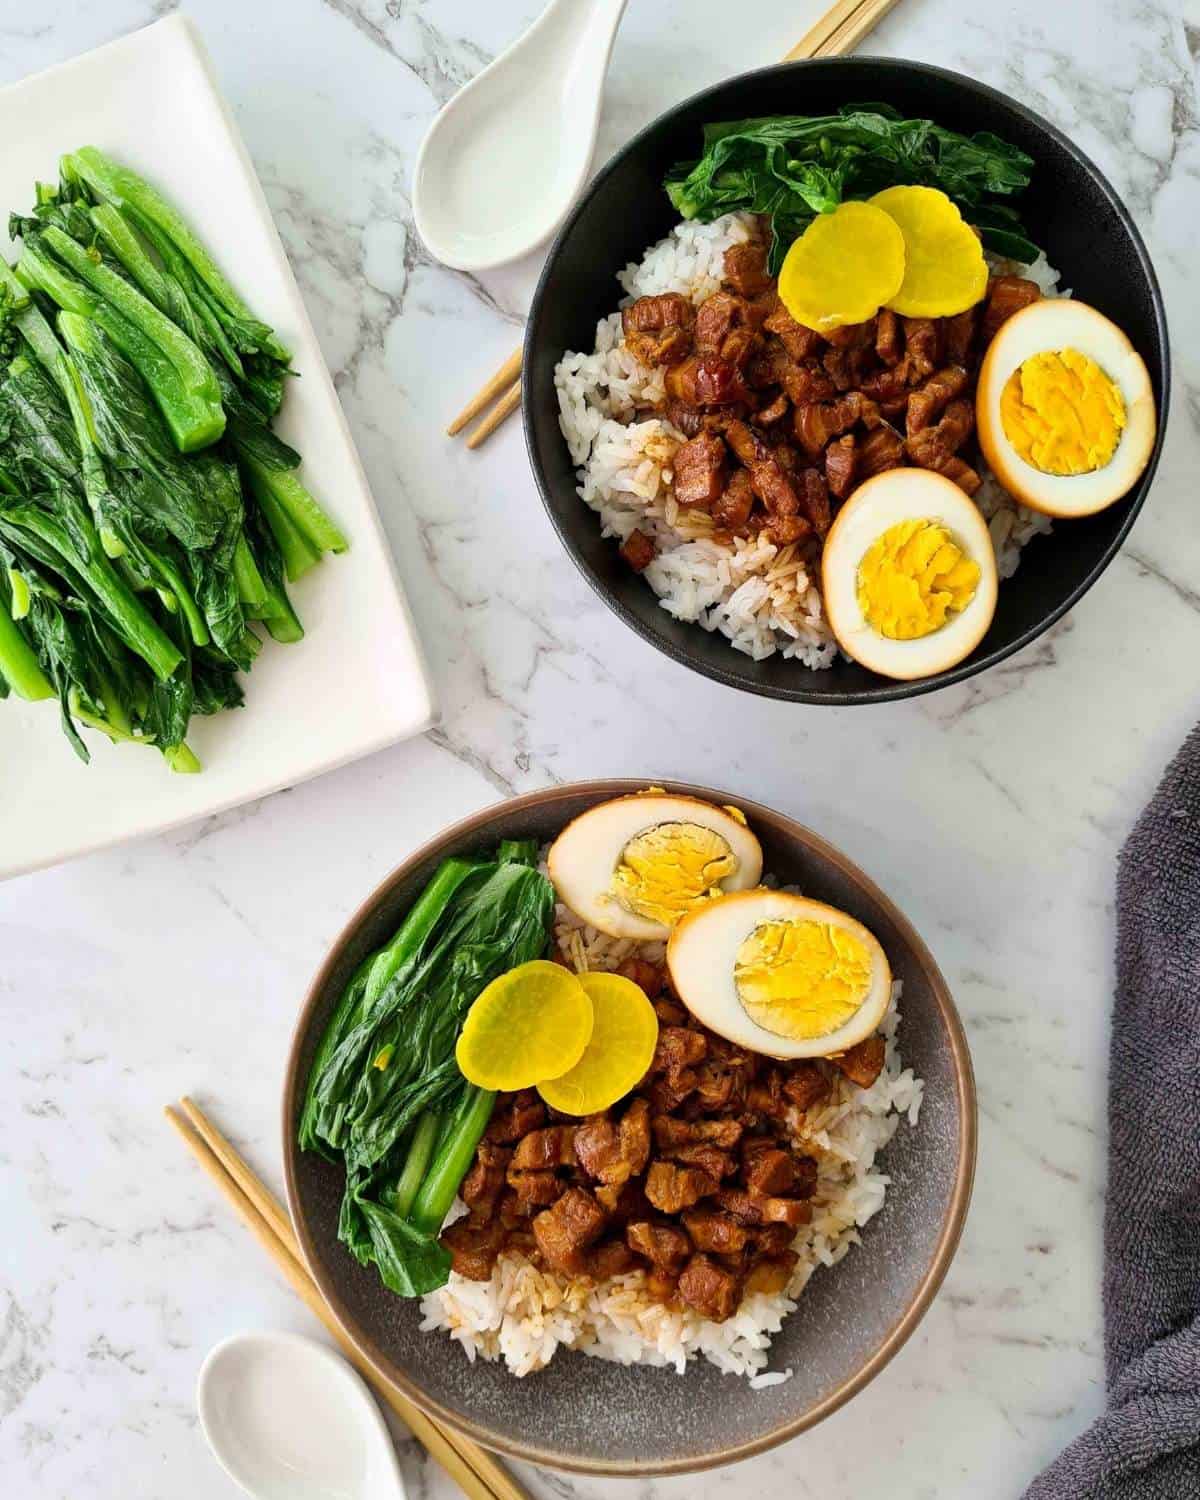
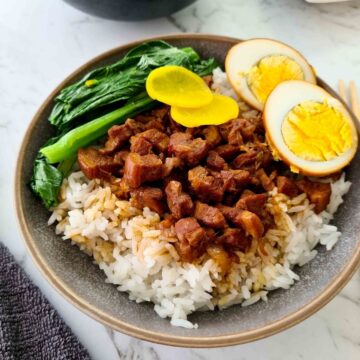
Lu rou fan (滷肉飯) or 'braised pork rice' is a very popular and much loved dish in Taiwan. As the name suggests, we're talking flavour-packed slow-braised pork over rice with just the right amount of sauce.
What makes this dish truly special is the use of pork belly with the fat cooked to melt-in-your-mouth perfection. As you can see from the image below, the pork belly is finely diced. This ensures every mouthful of rice will have pieces of saucy fatty pork accompanying it. So good.
A bowl of Taiwanese braised pork rice is comfort food at its finest. Delicious, generous and homely.
Snack or a proper meal
Due to the richness of this pork sauce, typically, lu rou fan is served in a small bowl, and eaten in small quantities, as a snack and can be found at pretty much every single night market in Taiwan.
To incorporate this dish into a meal, you can serve with a meat dish (like this homestyle Soy Sauce Chicken) and a couple of vegetarian dishes (such as a Tomato and Egg Stir Fry and Chinese Broccoli with Oyster sauce)
For more Taiwanese flavours, also check out my Tsao Mi Fun (vermicelli stir fry) and my seafood take on Taiwan's famous fried chicken, Salt and Pepper Squid infused with fresh chilli and basil.
PS. I'm slowly building a dedicated category of Taiwanese dishes on this site and am looking forward to sharing them with you! Stay tuned!
Jump to:
Ingredients
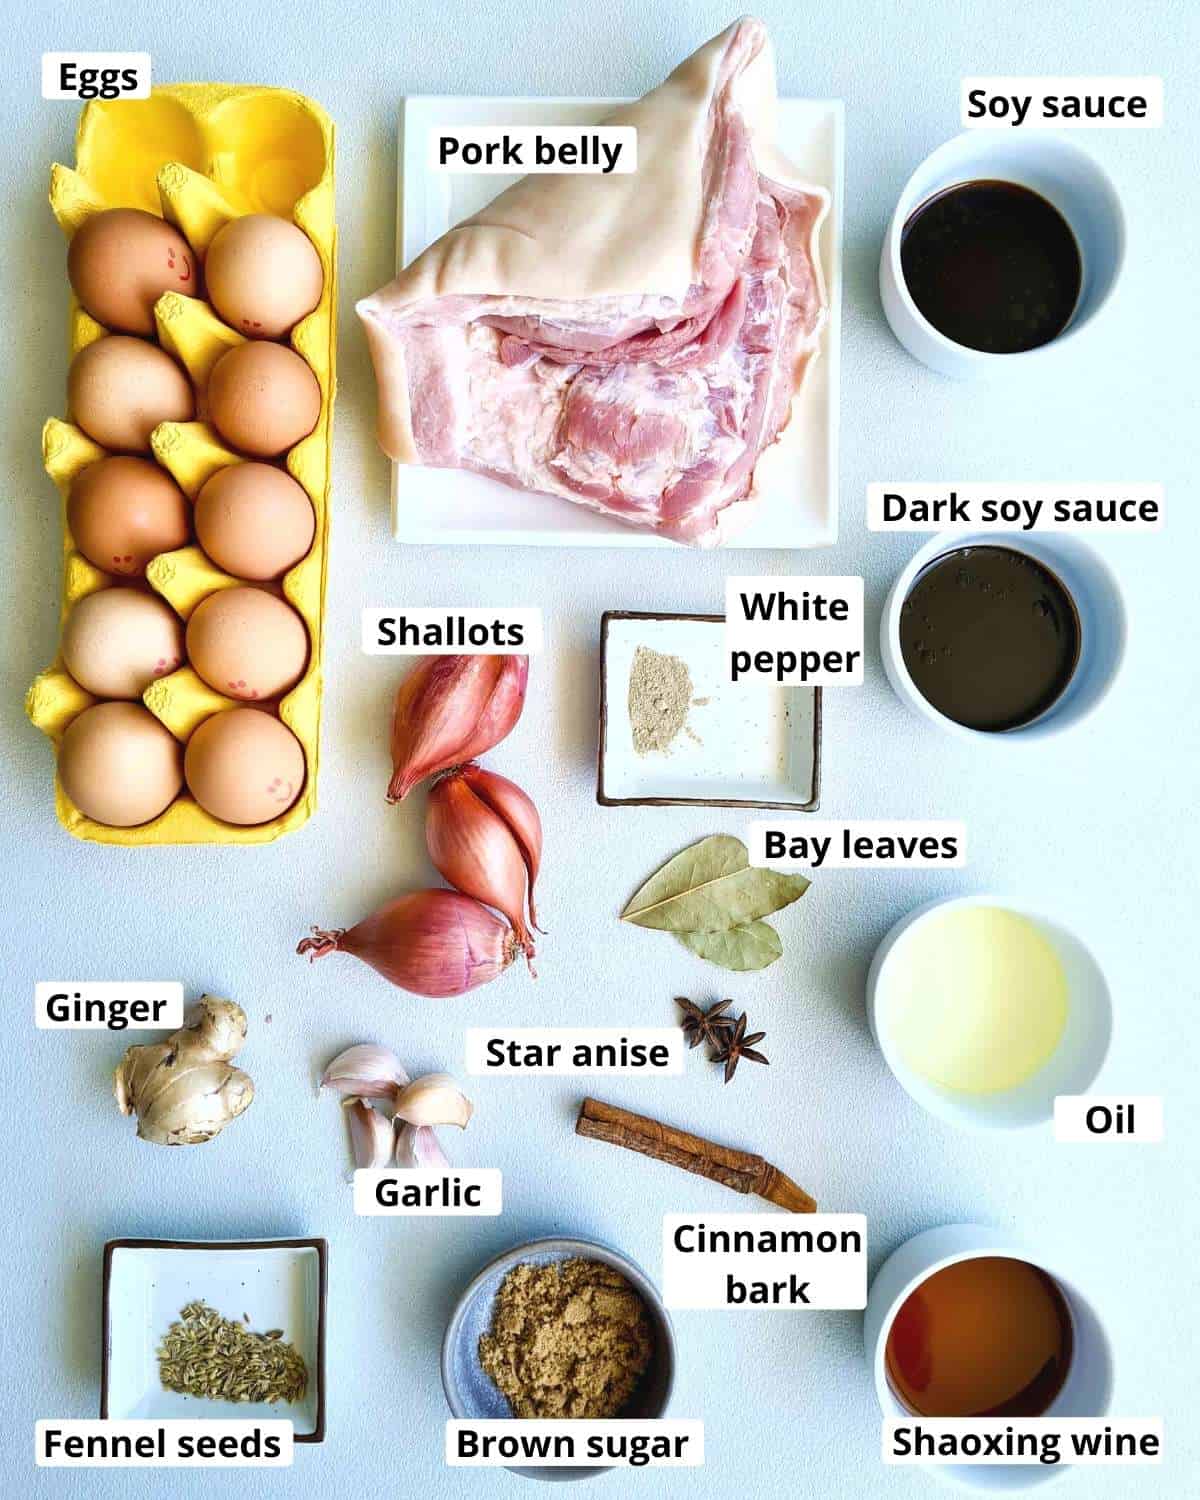
- Pork belly is KEY here. A good braised pork rice is very much dependent on the cut of meat you use. Pork belly has the perfect amount of fat to meat ratio and the skin will provide that delicious, gelatinous consistency to the overall sauce. You can substitute for leaner cuts of meats such as pork shoulder/neck, however, bear in mind, the end result will very much miss the mark. Not enough fat!
- Shallots are preferred over onions here as they're milder in flavour and have a delightful sweetness to them. I also find shallots more aromatic and thus perfect for this recipe.
- White pepper is a common spice used in Chinese cooking. You can use black pepper if that's what you've got. A high level difference between white pepper and black pepper is that white pepper has a more earthy flavour whereas black pepper is sharper and has more of a spice kick.
- Brown sugar can be substituted for rock sugar, palm sugar or even white sugar. I like using brown sugar as it's easily available (no speciality store trip required) and the added molasses provides a richer flavour profile (than that of white sugar).
- Shaoxing wine can be substituted for other rice wine varieties or dry sherry.
Now a bit about the key spices.
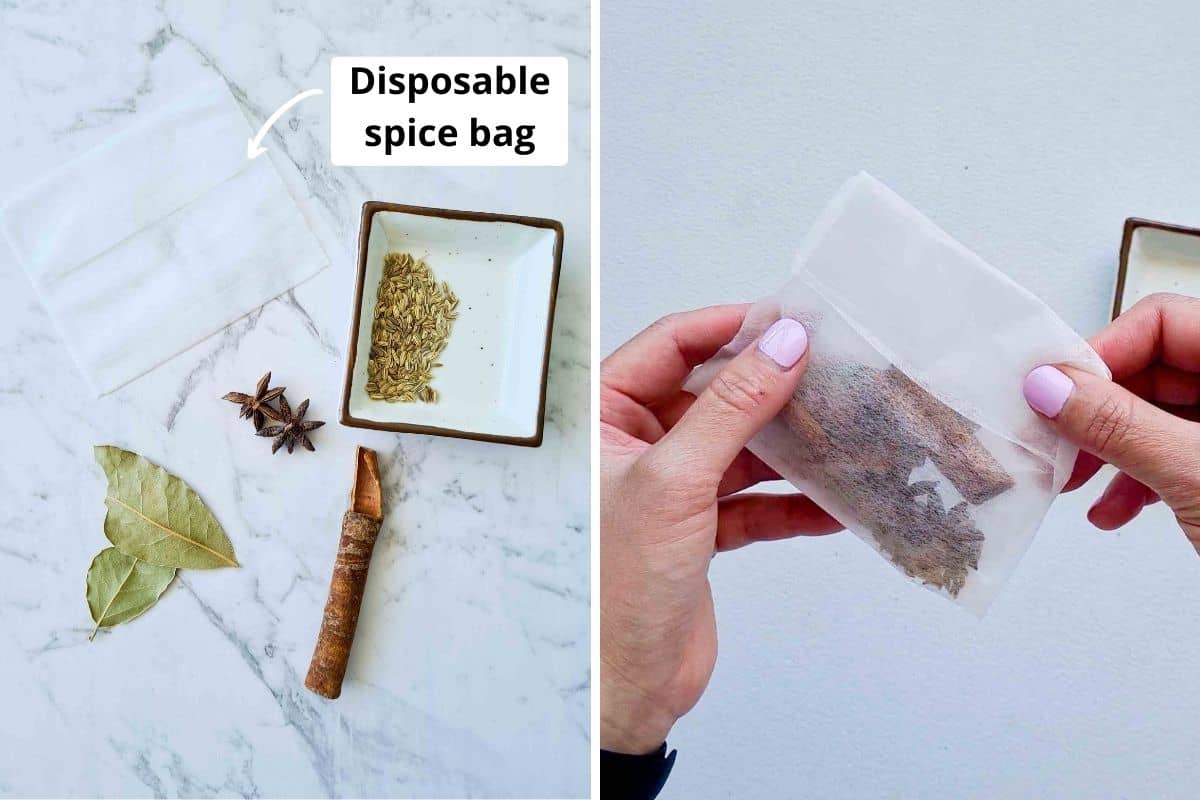
Make a little spice bag
I always prefer whole spices rather than the ground/powdered versions. Whole spices keep their concentrated flavours longer and tend to be fresher.
Rather than picking the spices out of the pot at the end of the cooking process, put them all together in a small spice bag. I like using disposable ones for convenience.
All of the spices below in the image can be found at your local major supermarket. No need to make a special trip to an Asian supermarket. However, I do find them cheaper there in general.
If you don't have a spice bag, here are a couple of options:
- Add the whole spices straight into the pot for braising with the exception of the fennel seeds. Substitute the seeds with powder. Once the cooking is done, conduct a little treasure hunt, pick out the whole spices and discard. This will only take a minute. Just a tiny bit inconvenient.
- Use Chinese five spice powder instead. It is the most convenient method. Simply replace with 1 teaspoon of Chinese five spice powder. However as mentioned above, I just find you get more from using whole spices. Especially when braising for hours on end!
Cooking instructions
This recipe is actually quite straightforward with minimal active cook time.
Let's get into it!
Removing impurities and dice pork belly
First, you want to remove the impurities of the pork by boiling it in water over high heat. This is a very common cooking practice in Asian cooking.
The 'impurities' refers to the white foam/scum you see in the image marked #2 below which is just denatured protein. It's harmless to consume however it is just unappealing and leaves the braise a little cloudy.
This step here will help make sure the braise stays clean in appearance.
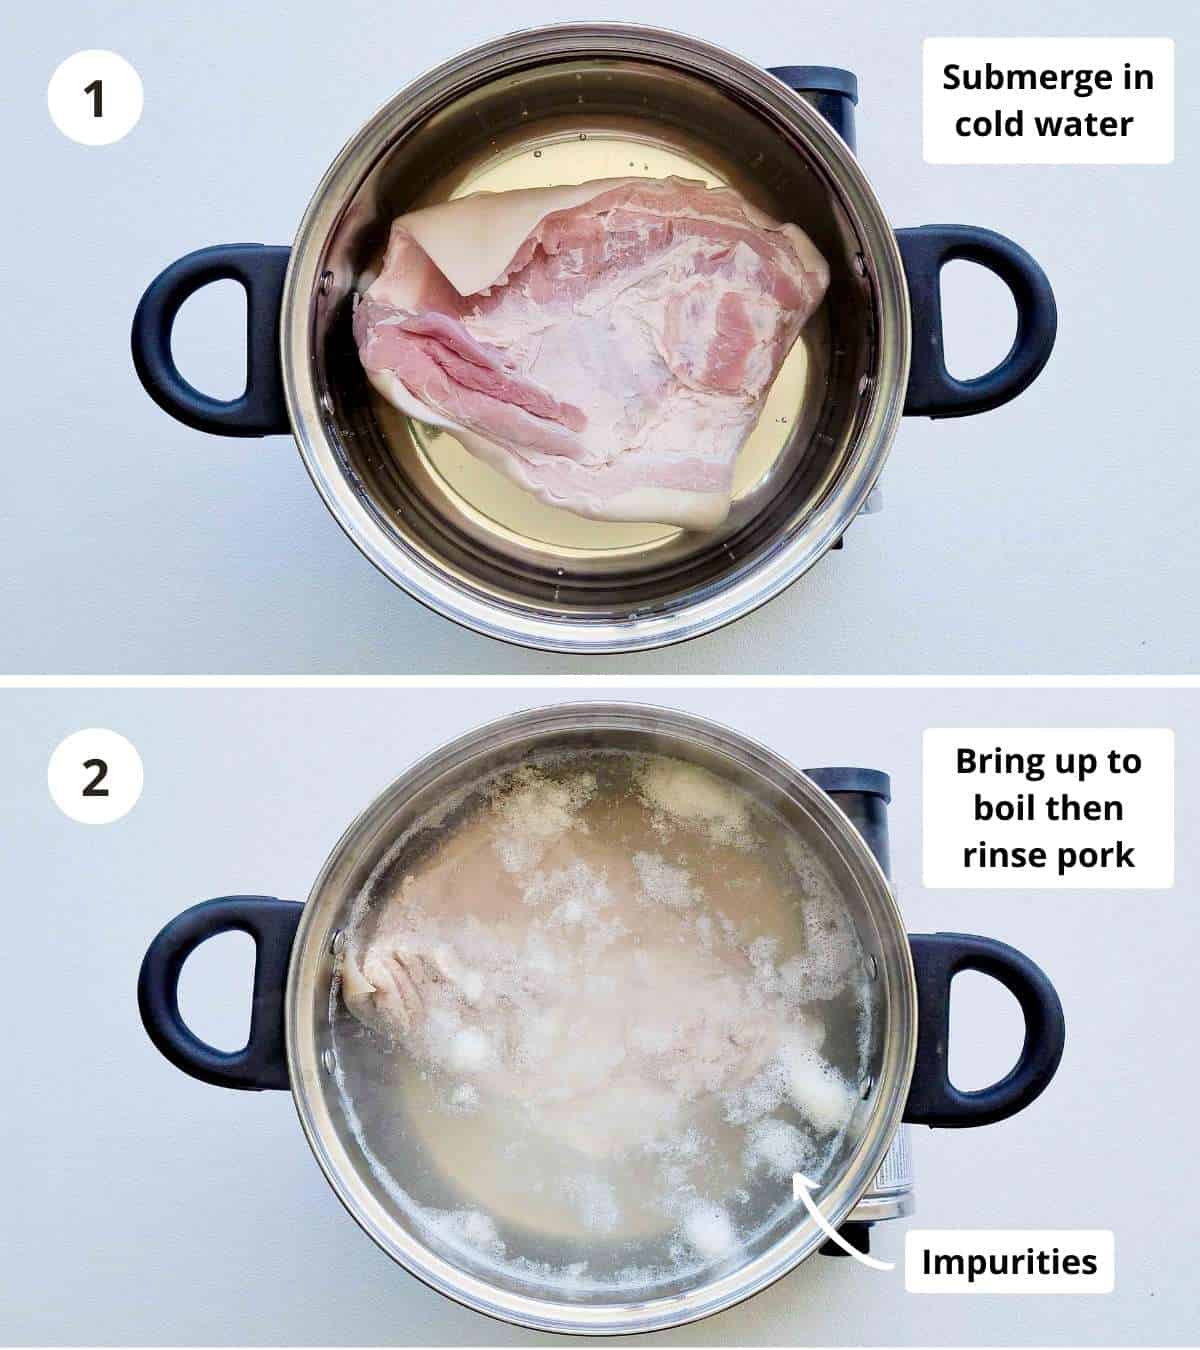
Once the pot starts to boil and the white foam has appeared, tip the water out and wash the pork belly under tap water thoroughly.
Now, pat the pork dry with paper towels and dice to small pieces.
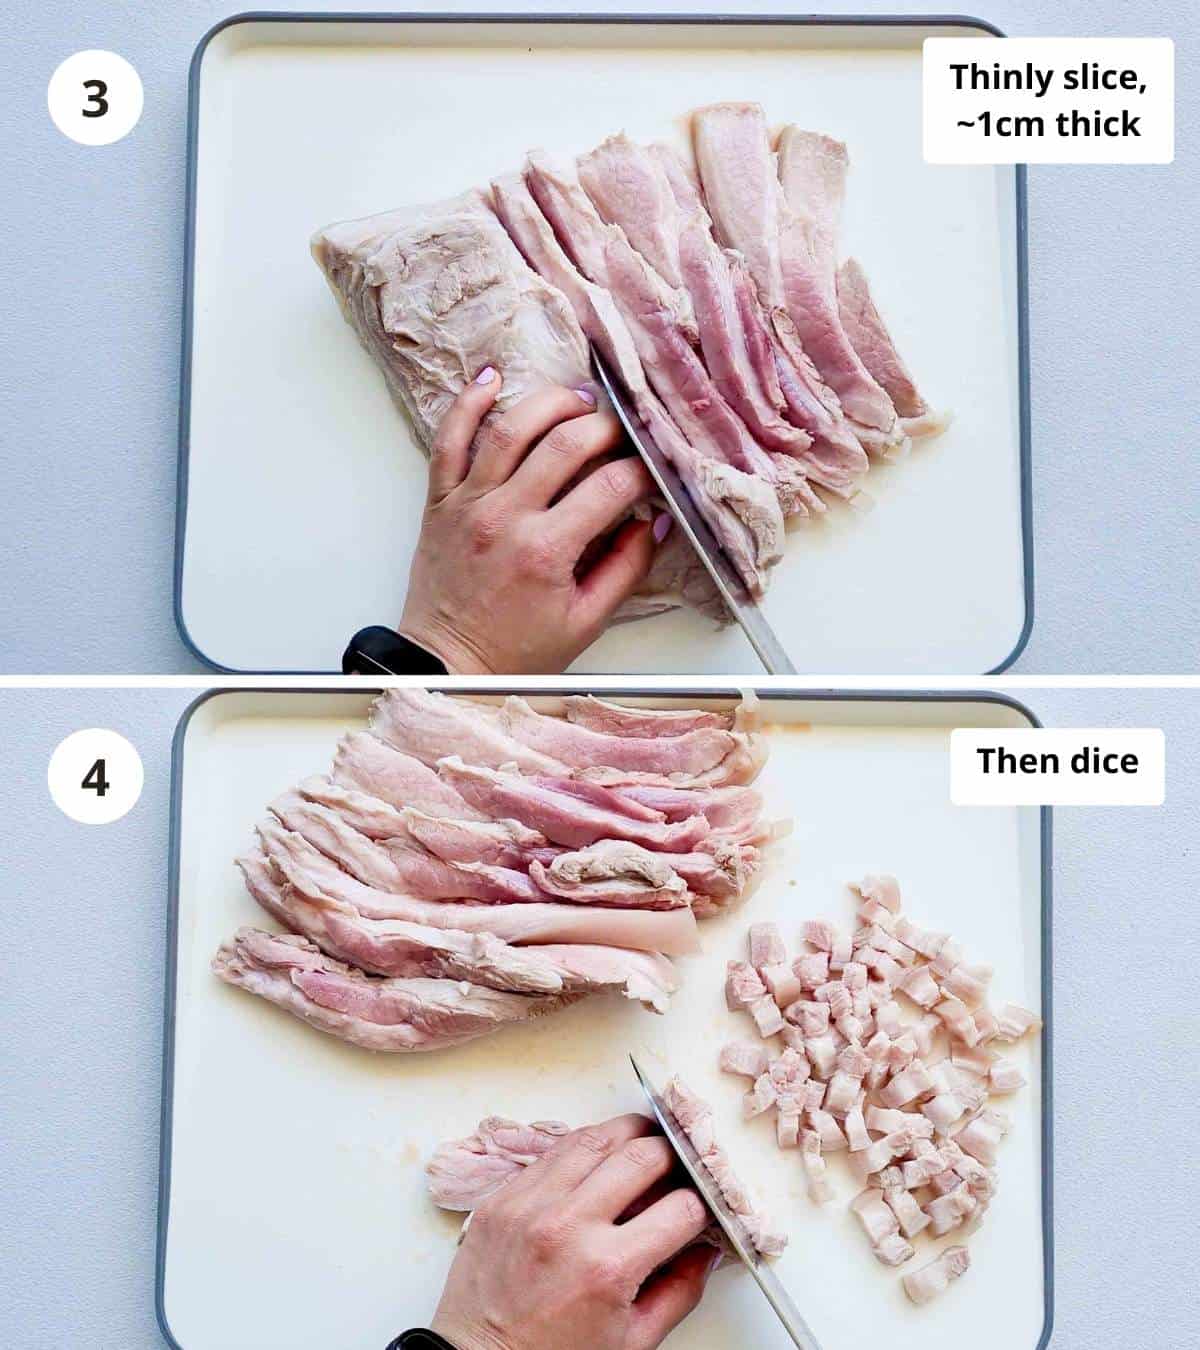
There is a little art behind dicing the pork belly here. First, you want to thinly slice (with a sharp) knife to about 1cm or just under ½ inch thick. Then, slice vertically (at the same thickness) like so in image #4 above. That's it. Do not cut the pork any further. Rather than cubes, the pork should be in small rectangular shapes.
This way, every piece of meat will have one part meat and one part fat. This ensures a good meat, fat, sauce and rice ratio at every mouthful. 😉
Time to braise the pork
Moving onto the fragrant part. First, fry thinly sliced shallots till golden over medium-low heat. This will take about 3 minutes. Remove half of the shallots for later.
Hint: it'll be used as an aromatic booster to the finished dish.
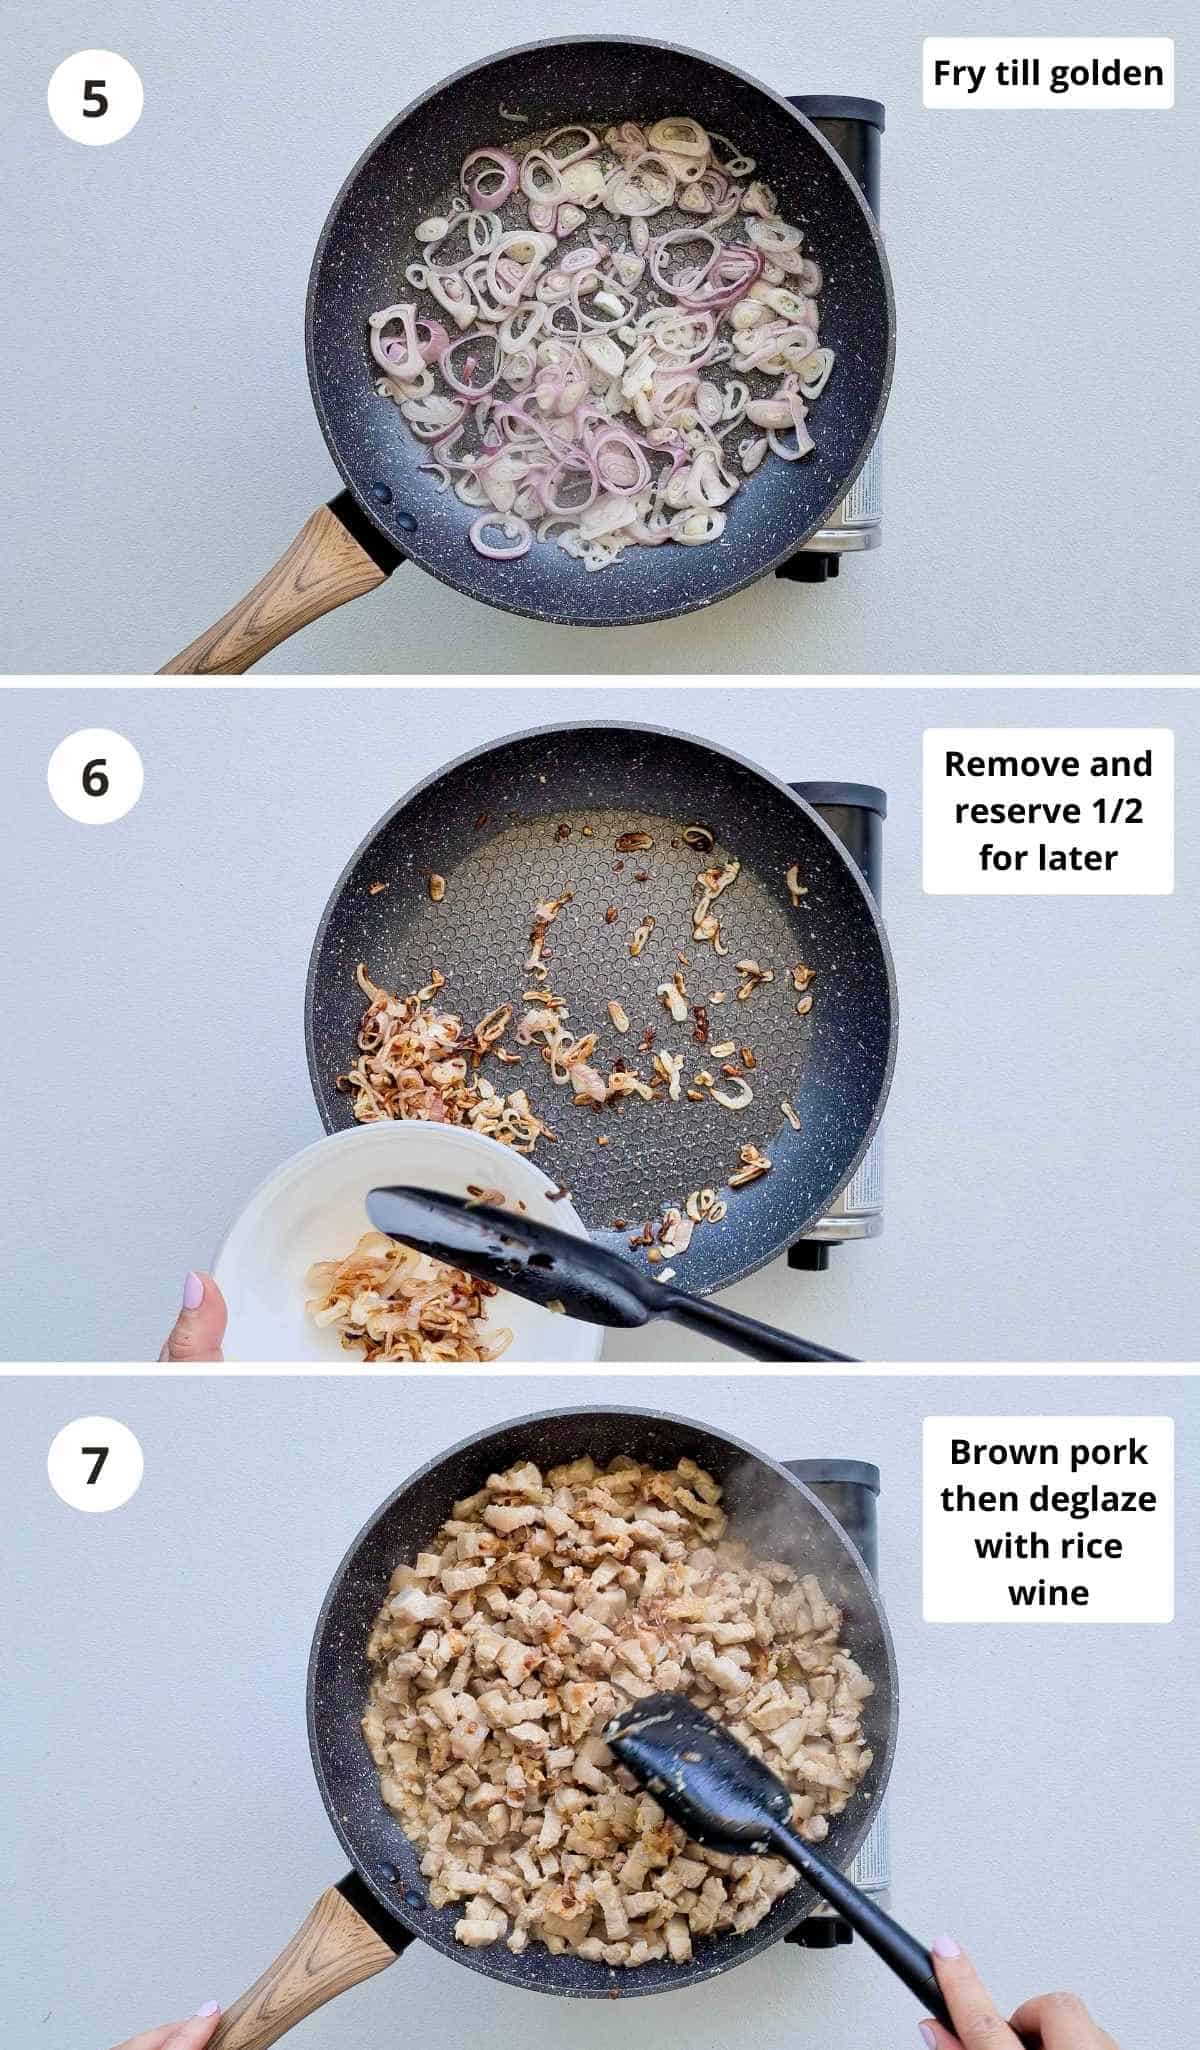
Add finely minced garlic and ginger (I use a small cheese grater to mince ginger) to the pan. Fry for a minute or so till aromatic then brown pork on high heat. This browning step will great more depth to the overall dish.
Deglaze the pan with rice wine then transfer to a heavy-based pot with a lid such as a Dutch oven like I did in these pictures.
Now, add soy sauce, dark soy sauce, sugar, white pepper, chicken stock or water. Mix well then add the spice bag that's filled with star anise, fennel seeds, cinnamon bark and bay leaves.
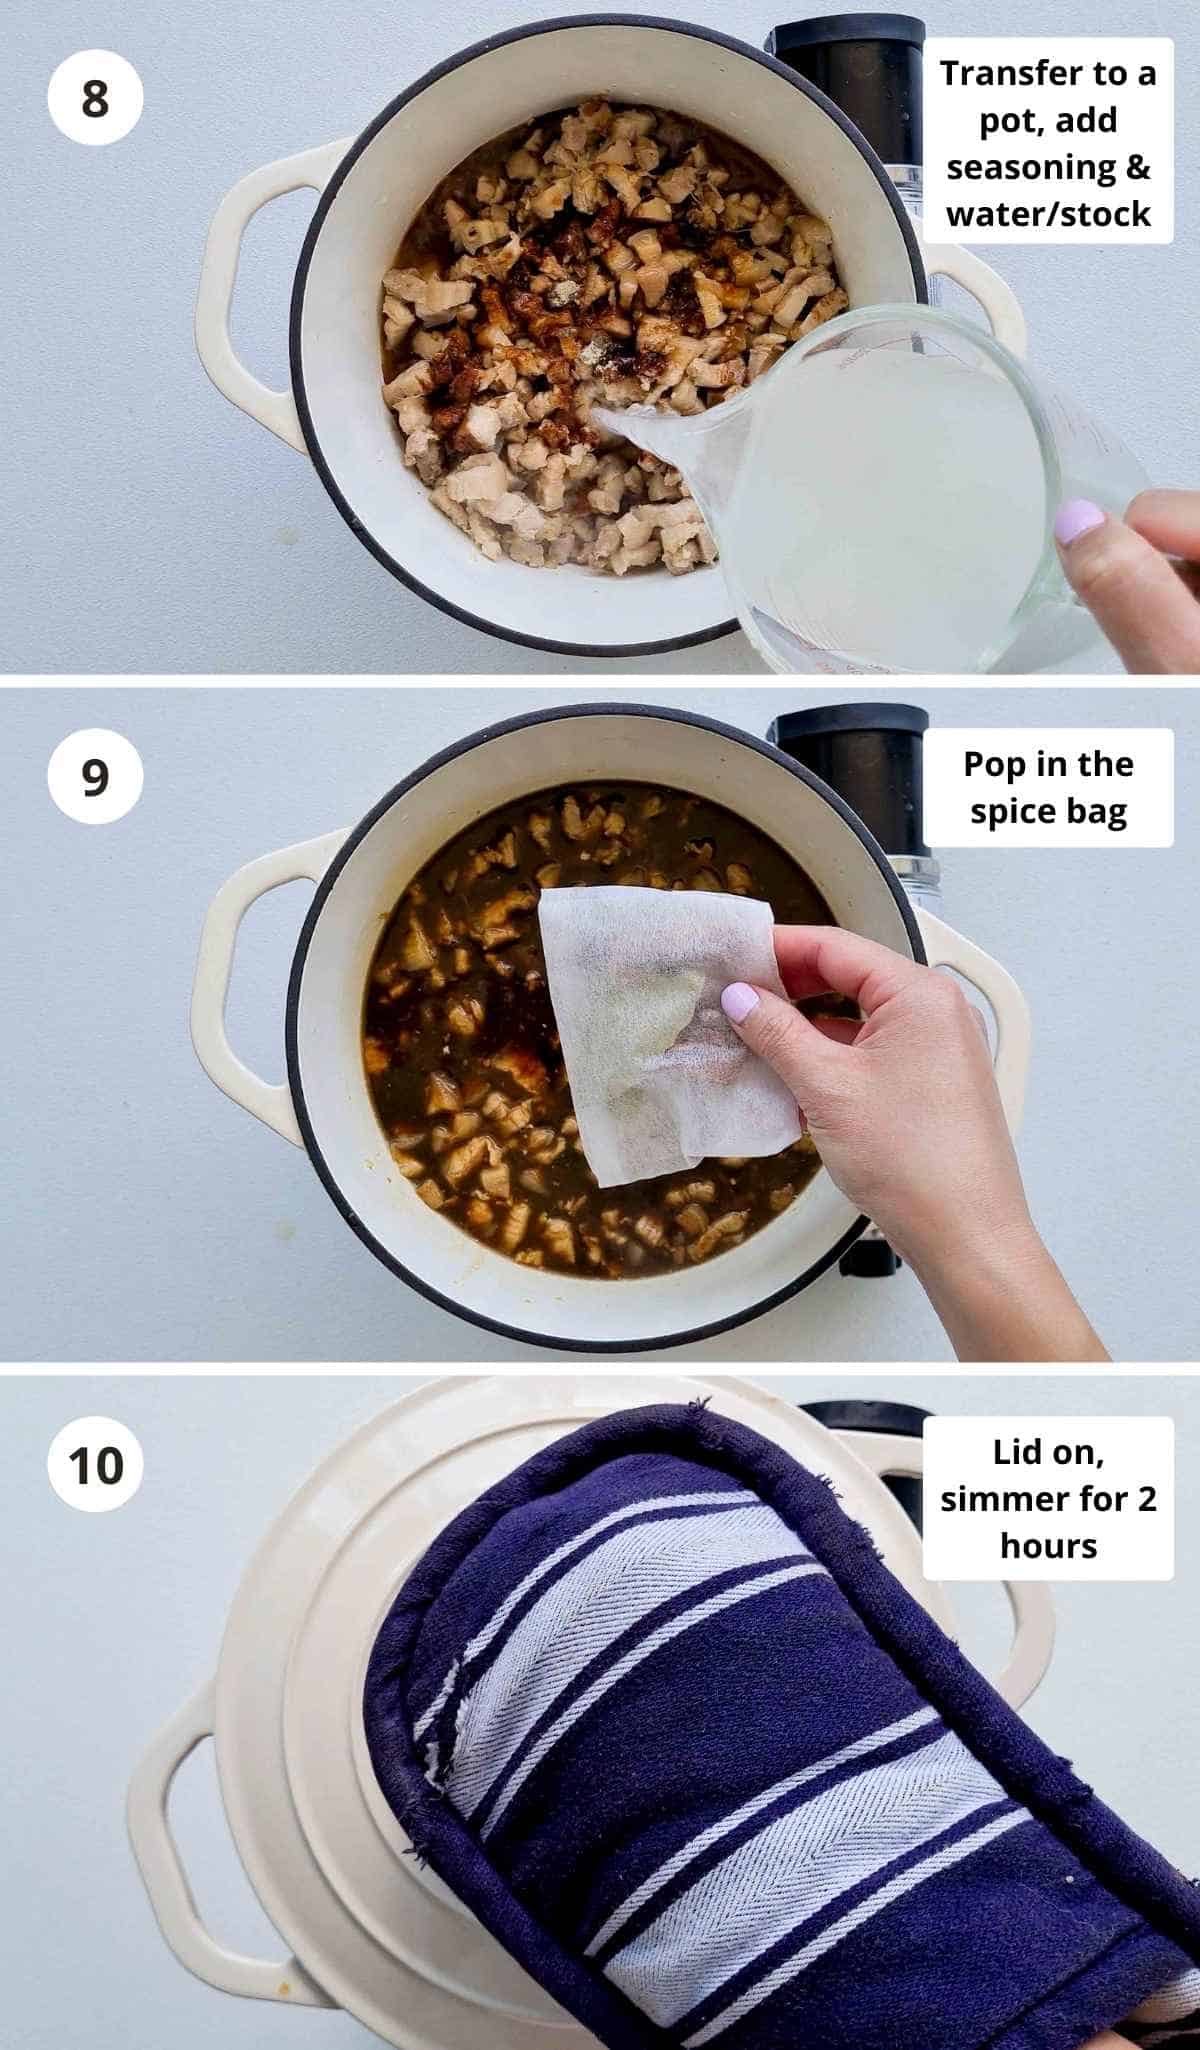
Once at boiling point, reduce heat down to the lowest your stove can go. Simmer for 2.5 hours with the lid on.
Add boiled eggs
Whilst the pork is braising away, boil and peel eggs. I used 10 eggs, you can use more or less depending on your preference.
Once 2.5 hours of braising is up, add the boiled eggs and simmer for 30 minutes with the lid on. Turn the eggs once with 10 minutes left and add the reserved fried shallots.
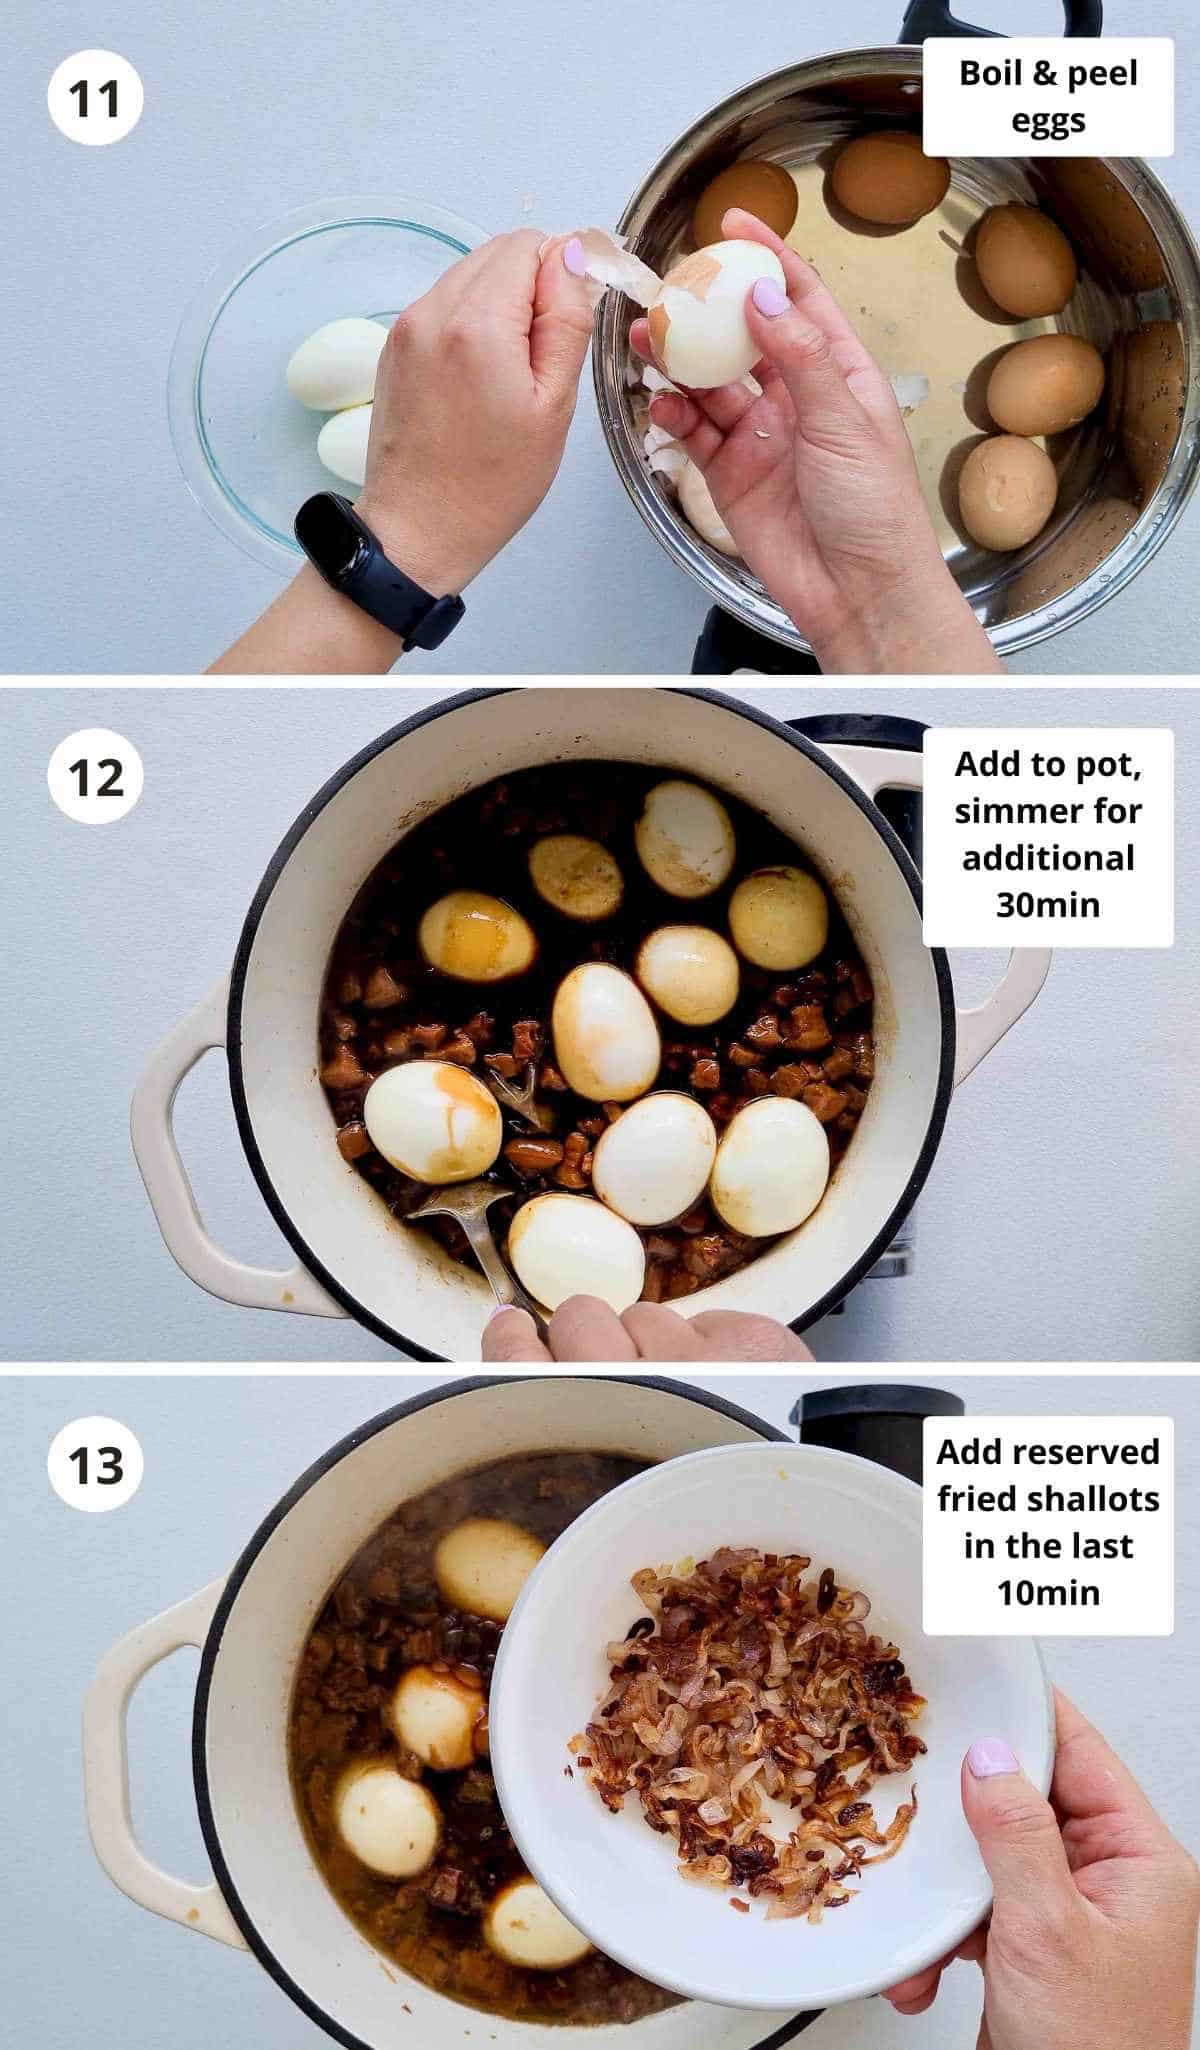
The fragrant fried shallots will help 'wake up' the braise.
How to serve lu rou fan
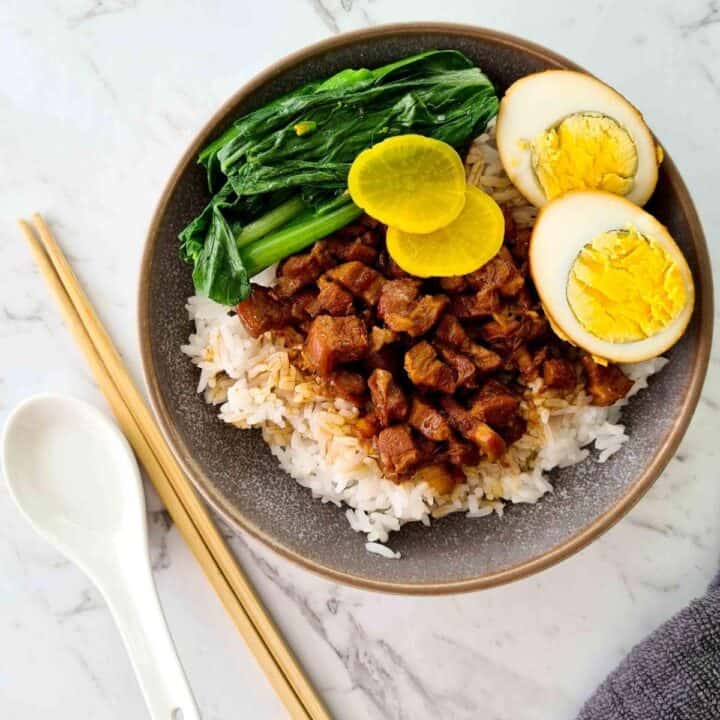
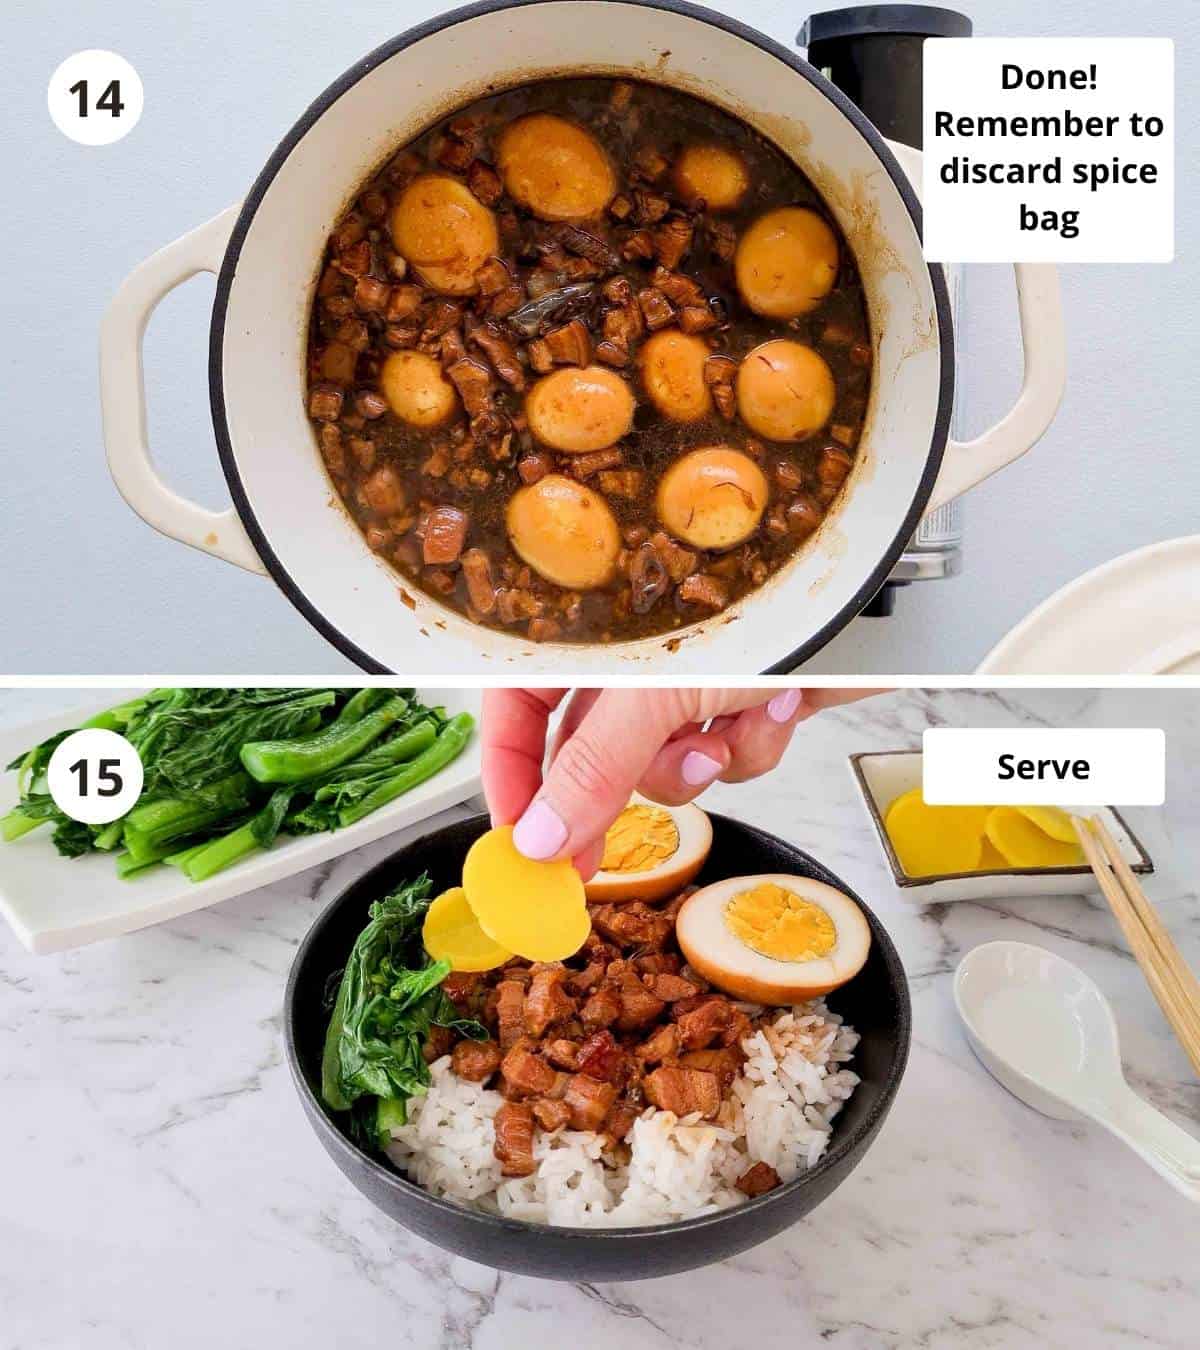
To serve the authentic way, fill a bowl with freshly steamed rice, top with a ladle of the braised pork with sauce, a braised egg cut in half and thin slices of yellow pickled radish.
Add some simply blanched Asian greens for good measure.
The yellow pickled radish ('Takuan' in Japanese) is optional here but is typically served in Taiwan. I suspect the use of Japanese pickled radish stems from Japan's 50-year rule of Taiwan from 1895 to 1945. The sweet and acidic pickles will cut through the richness of the fatty pork perfectly.
You can find these pickled radishes at most Asian supermarkets in the fridge section.
Other serving suggestions
This braised pork with sauce recipe is extremely versatile. There is no reason to limit serving this delicious masterpiece with only rice.
Some suggestions include:
- Serve with freshly cooked plain noodles (similar to my 20-minute Pork Mince Noodles),
- drizzle over some freshly steamed Asian greens such as Chinese broccoli (a meaty twist to this Chinese broccoli with Oyster Sauce)
- or even on top of some fresh silken tofu!
Tips for making the best lu rou fan
- Cook long and slow. This is not a dish that can be rushed. You've got to give the 3 hours of braising time over low heat or longer. At the very minimum, 2.5 hours is needed. The braising process will soften the pork and turn the fat to melt-in-your-mouth perfection. Not to mention this will allow plenty of time for the spices to really work their magic and infuse into the meats and sauce.
- Use a spice bag. It just makes your life easier.
- Keep the lid on whilst braising. This will keep the heat stay insulated in the pot and properly soften the pork all the whilst reducing the sauce at a slow pace.
- Use a heavy-based pot. This is important for even heat distribution. Particularly useful when braising for hours. Zero worries about any sticky bottoms. I use a Dutch oven (cast iron pot) and it does the job perfectly.
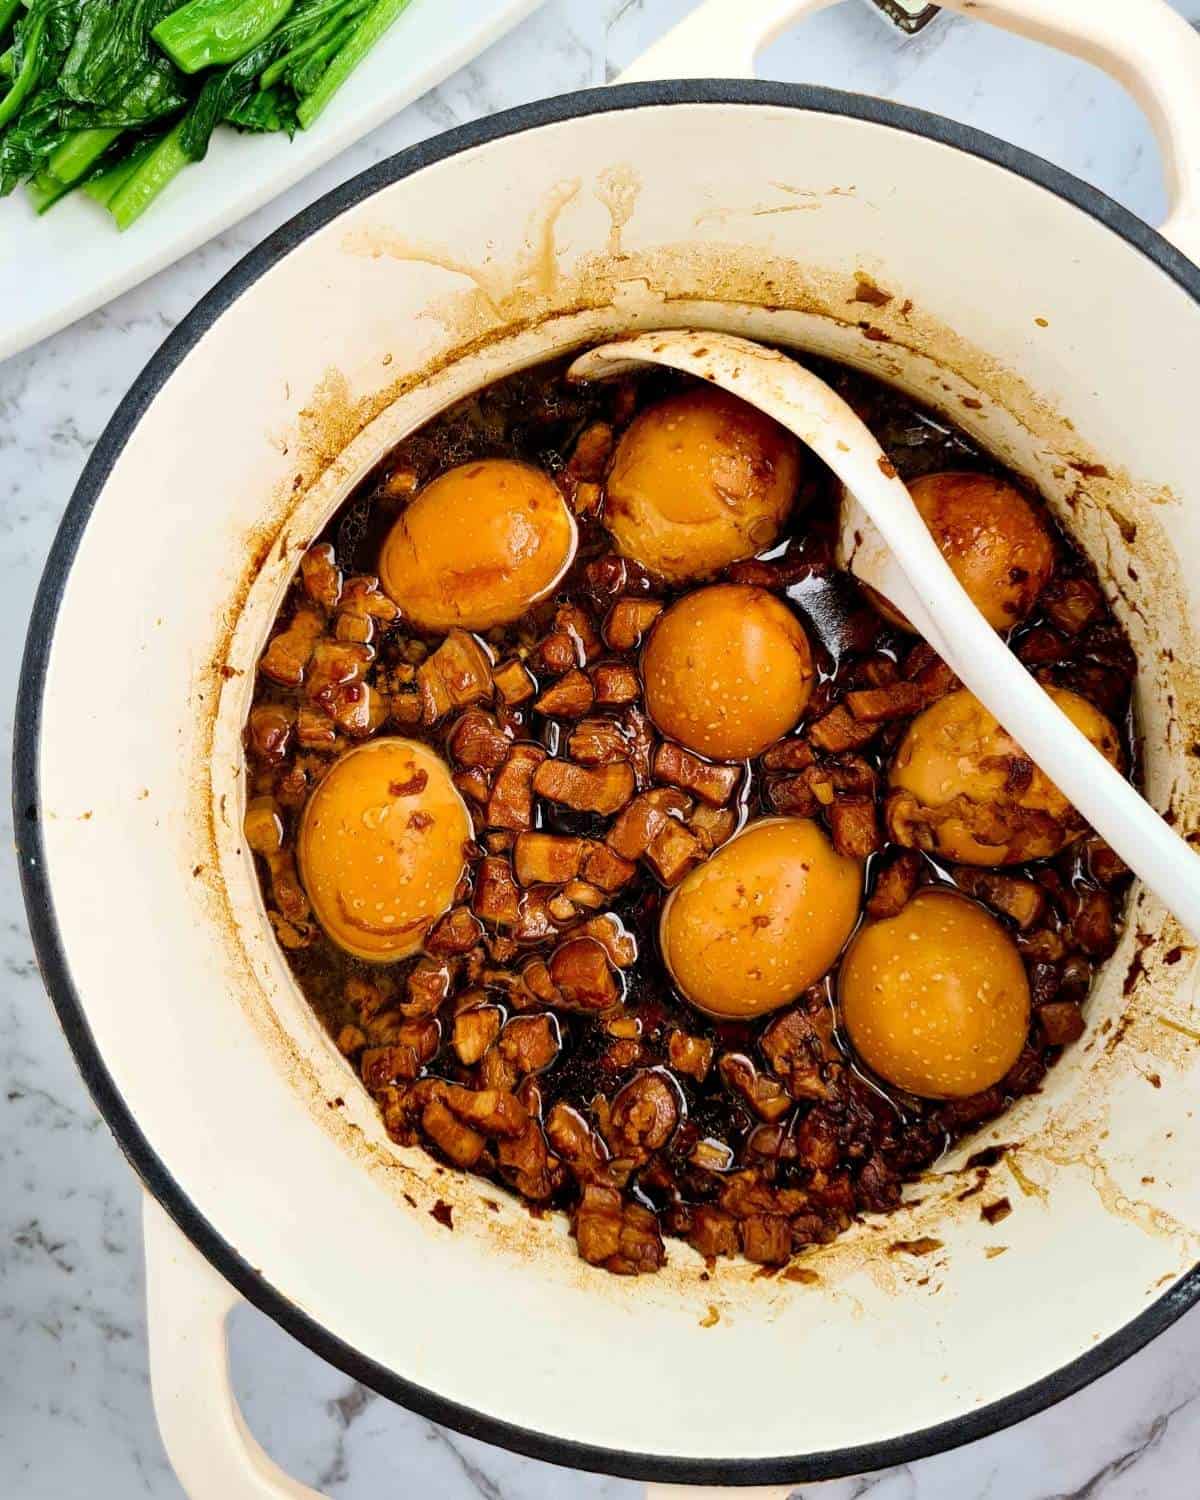
See that line around the pot below? That's where the sauce started at the beginning of the braising process. This is what you want. Sauce reduced but not too much.
If for any reason your sauce becomes too thick, add a little water to dilute it.
Good to know (FAQs)
Absolutely! There are, however, two things that will need to change. Cook time and amount of water/stock to use for the sauce. Moisture doesn't evaporate and escape in a slow cooker compared to stovetop cooking.
Thus, to use a slow cooker instead, you'll need to make the following changes to the recipe:
1. Cook for longer. At step 6 of the recipe card below, transfer to slow cooker and cook on high for 8 - 12 hours. Add the boiled eggs in with 1 hour left of the cooking time, turning once after 30 minutes and add reserved fried shallots then.
2. Reduce water/stock from 2 cups to 1 ¼ cup.
Lasts up to 3 - 4 days in the fridge and 2 - 6 months in the freezer stored in air-tight containers.
Convenient freezing tips
This recipe will yield approximately 12 to 15 servings in small portions, as lu rou fan is supposed to be enjoyed. A convenient way to freeze these is to portion the meat sauce in small packs before placing it in the freezer. Depending on the size of your household, you may want to keep 2 or 4 serving portions in each container.
This way, you'll only defrost just the right amount when you want it. The rest can be stored for another day! 🙂
Made this recipe? Let me know your thoughts or questions by dropping a note in the comments section below! I'd love to hear from you 🙂
Happy cooking! - Gen
Video
📖 Recipe
Lu Rou Fan (Taiwanese Braised Pork Rice)
Ingredients
- 1 kg / 2 pounds pork belly
- 10 eggs
- 4 cloves garlic minced
- 3 cm / 1inch fresh ginger minced (note 1)
- 3 shallots finely sliced
- 2 tablespoon soy sauce
- 2 tablespoon dark soy sauce
- ¼ cup shaoxing wine substitute: dry sherry
- 1 tablespoon brown sugar substitute: rock or white sugar
- ¼ teaspoon white pepper
- 2 tablespoon neutral tasting oil eg. sunflower oil
- 2 cups chicken stock or water
Spice bag (note 2)
- 2 star anise
- ½ teaspoon fennel seeds
- 1 stick cinnamon bark
- 2 dried bay leaves
Instructions
Make the spice bag
- Place spices into a muslin spice bag (or reusable ones). Ensure spices are locked in.
Prepare (remove impurities) and cut the pork belly
- Rinse pork belly under the tap with cold water then submerge in a large pot of cold water. Ensure there is enough water to cover the entire pork belly. Bring up to boil over the stove at high heat. Off-white foam/scum will float to the top of the pot. These are impurities. Once boiling, carefully discard the water and wash the pork under the tap.
- Pat the pork belly dry with paper towels. With a sharp knife, thinly slice the pork to about 1cm (just under ½ inch) thick then dice. See the image in the post above for reference. (note 3)
Braise the pork belly
- In a wok or medium-sized pan, fry shallots with oil at medium heat until deep golden. Remove half of the fried shallots into a bowl and set aside for later.
- Add garlic and ginger into the pan, stir fry until aromatic then add diced pork. Stir fry on high heat for about 3 minutes. Deglaze with shaoxing wine and cook for a further minute.
- Transfer the pork mixture to a heavy-based pot with a lid. I used a cast-iron pot. Add soy sauce, dark soy sauce, white pepper, sugar, water/stock and spice bag.
- Bring up to boil then reduce heat to low (as low as your stove can get). Lid on and cook for 2½ hours.
Boil eggs and finish off
- Whilst the pork is braising, boil and peel eggs.
- After 2½ hours of braising, mix in boiled eggs and braise on low heat with the lid on for a further 30 minutes. With 10 minutes left to go, turn the eggs for even colouring/seasoning and mix in reserved fried shallots.
- Remove spice bag just before serving.
To serve
- Scoop a ladle or two into a bowl of rice with an egg, some Asian greens and (optional) pickled radish.
Video
Notes
- Add the whole spices straight into the pot and substitute the fennel seeds with powder. Pick out the spices and discard once finished cooking.
- Use Chinese five spice powder instead. Simply replace the spice bag with 1 teaspoon of Chinese five spice powder. However as mentioned in the post above, I just find you get more from using whole spices. Especially when braising for hours on end!


Jane
My sister made this lu rou fan recipe and I loved it. Wanted to try making it too. Just wondering how you would adapt this recipe for a pressure cooker (instant pot)?
Genevieve
Hi Jane, I have not tried making this dish in a pressure cooker. Nonetheless, if I were to, I'd follow the steps as per the instructions and at step 6, I'd tranfer into a pressure cooker instead and cook for 1 hour instead of 3 hours. After 1 hour of pressure cooking, I'd add the boiled eggs in and use the slow cook function on high for about 30 minutes (I've never tried pressure cooking boiled eggs and suspect they'll burst so on the safe side, I'd put them in after pressure cooking and use the slow cooker function to get the flavours into the eggs). Hope this helps and thank you for your comment! 🙂
Jackie
Authentic and easy to make recipe!!! Thanks for sharing!!!
Genevieve
My pleasure! 🙂 Glad you like it!