Panko chicken schnitzel (aka chicken katsu) is, I'd say, the elevated version of the widely popular chicken schnitzel. By switching normal breadcrumbs with panko breadcrumbs, the golden crust comes out light and crispy every time. The delightful crunch factor is a total game changer!
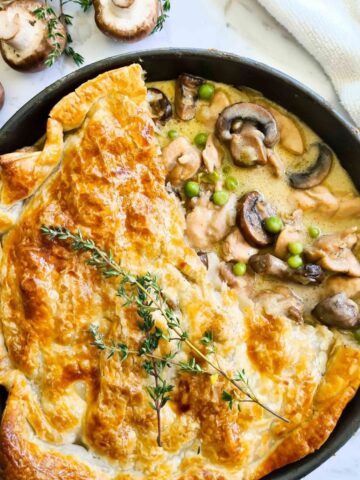
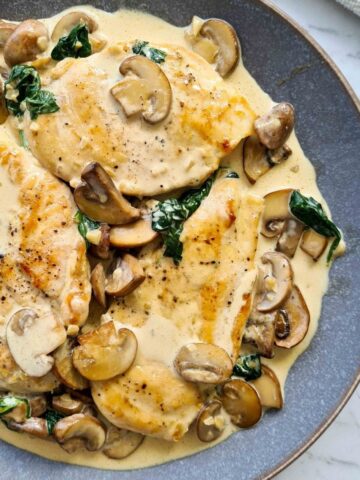
Perfect on its own with a simple salad or get indulgent and serve with a delicious creamy mushroom sauce!
Can't get enough of crispy bites? Try my flavour-packed, basil and chilli infused salt and pepper squid! Just like this panko-crumbed chicken recipe, it's golden crispy on the outside, tender juicy on the inside.
Jump to:
Normal breadcrumbs vs panko
Panko breadcrumbs are Japanese breadcrumbs made of white bread without crusts. The white bread is flaked and dried into crispy crumbs. These breadcrumbs are light, flaky and without the grainy texture that normal storebought breadcrumbs tend to have.
Panko has a flakier consistency (which gives the beloved crunch factor) and is perfect for shallow/deep frying.
Available at most Asian supermarkets and if you're in Australia, major supermarkets now sell them too (Got mine from Coles the other day)! If you haven't used panko before, I urge you to give it a go!
Ingredients

- Frying oil - neutral-tasting oil such as sunflower or canola. Even better, olive oil is my top choice as the flavour works perfectly with the crumbed chicken. Plus, olive oil is much better for your health!
- Chicken breasts where possible, use fresh chicken breasts as opposed to frozen-thawed. Fresh chicken is always juicier.
- Panko breadcrumbs - light and crispy breadcrumbs that can be found at Asian grocers.
- Eggs - play a big role in this simple recipe as the binding ingredient so that the panko breadcrumbs stick onto the chicken.
How to coat and shallow fry panko chicken
There aren't many steps to making panko crusted chicken. Simply coat the chicken with flour, eggs and panko breadcrumbs then shallow fry.
Set up a station and coat
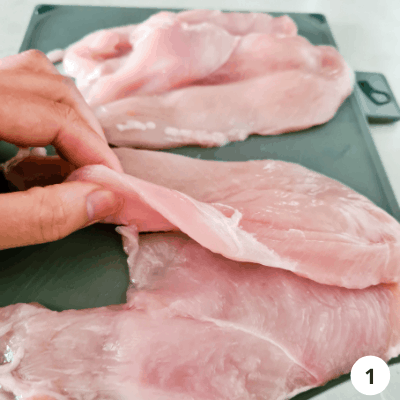
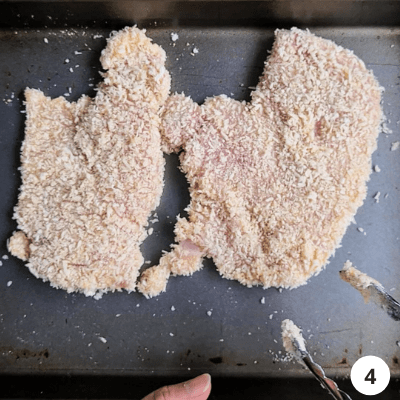
STEP 1. Slice chicken breasts into chicken cutlets horizontally into about 1cm or half an inch thickness. Like image #1 below. This will ensure the chicken have a uniform thickness which will allow the chicken to cook evenly. Even thickness can also be achieved by pounding the chicken if you've got a meat tenderiser (meat pounder).
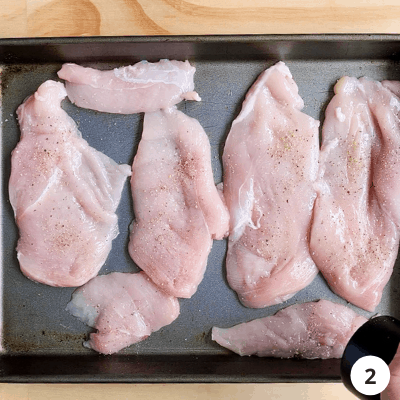
STEP 2. Season with salt and pepper. This adds flavour into the chicken and also help make the chicken juicier! To jazz things up a little, you can also sprinkle the chicken with garlic powder for extra flavour.
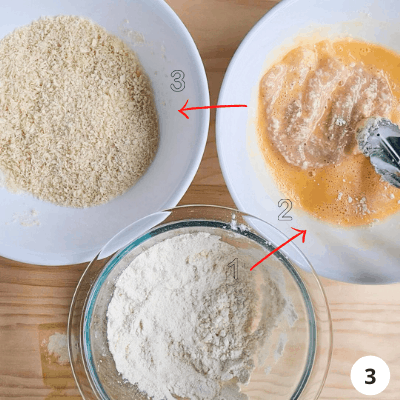
STEP 3. Very important: set up a station. This will make your life so much easier and the coating process smooth and fuss-free. Create an assembly line of 3 separate shallow bowls (or deep plates): 1 for whisked eggs, 1 for panko breadcrumbs and 1 for flour. Like image #3 below.
Using a pair of tongs, coat 1 slice of chicken with flour, shake off excess then dip chicken in whisked eggs, then finally, coat with panko. Make sure the entire chicken piece is completely covered each step of the way by each of the coating ingredients.
STEP 4. Repeat for all chicken pieces.

Shallow fry till golden
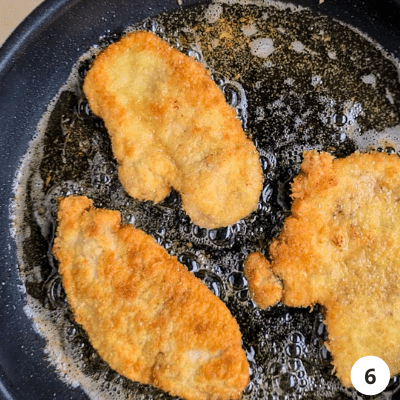
STEP 5. In a large skillet or a heavy-based frying pan, shallow fry the chicken pieces. Before frying, first, heat the oil on high heat to about 180°/350°F. To see if the oil is hot enough without a cooking thermometer, drop a little breadcrumb into the oil. If it sizzles immediately then the oil is hot enough.
To cook, gently lay the chicken into the hot oil. Just like deep frying, do not overcrowd the pan as it'll cool the pan down and the chicken will start to release juices. You want the chicken to have sufficient wiggle room like images #5 and #6 above.
For this recipe, you'll need to shallow fry in 2 batches. To speed things up or if making double the portions, cook with 2 large skillets/fry pans at the same time!
STEP 6. Fry on medium-high heat for about 3 - 4 minutes or until golden per side, flipping once ONLY! Take a peek by lifting a piece and if the frying side is golden, you know it's good for flipping!
Removing the chicken as soon as it's cooked is key to juicy and tender chicken breasts. Just like my chicken noodle stir fry, as long as the chicken breasts are not overcooked, the meat will always come out tender and never dry even without marinating!
Useful shallow frying tips
- Make sure the oil is hot enough. Test by dropping a small pinch of panko breadcrumbs into the pan and if it sizzles then the oil is ready for frying.
- Use just enough oil. A general rule of thumb, you want enough oil to reach about half the thickness of a schnitzel.
- Flip the schnitzel once only (or max twice)! If you mess with the chicken too much whilst it is frying, it'll start to release its juices. This will not only cool the pan down (hello oily stewed schnitzel), the oil will start spitting everywhere. and the chicken will lose its juicy factor!
- Do not overcrowd the pan.
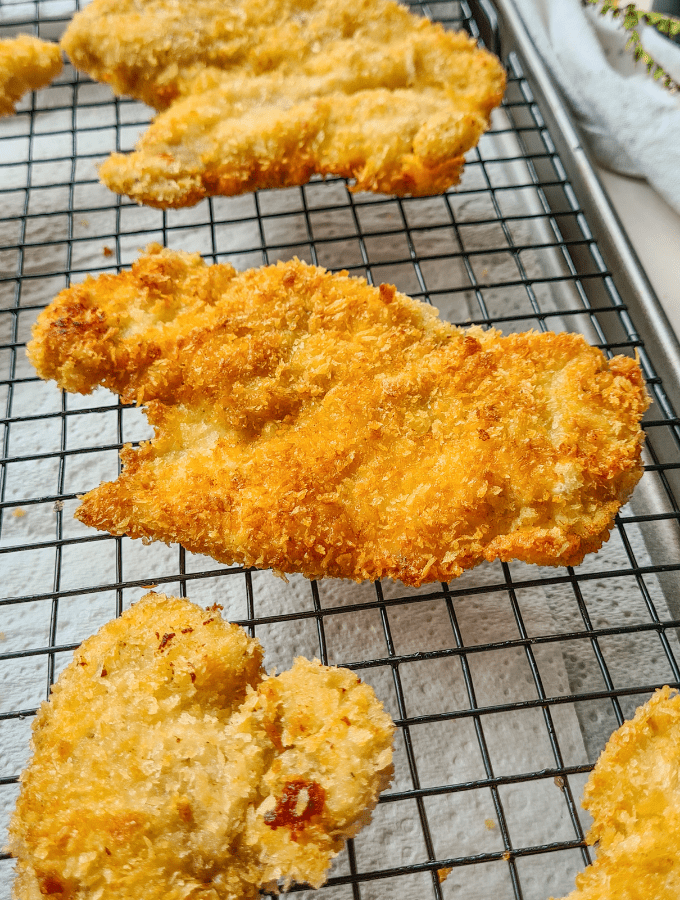
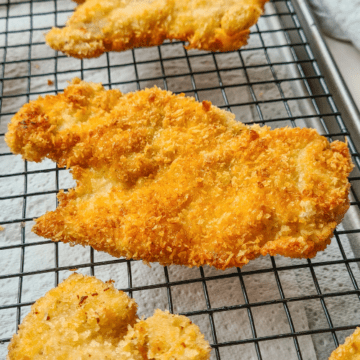
- Once cooked, let it rest on a cooling rack with paper towel lined below the rack (to catch dripping oil). Like the image above.
Good to know (FAQs)
The combination of flour and whisked egg will create a sticky coating around the chicken will helps panko to stick to the chicken easily!
Panko is made with crustless white bread that has been flaked into tiny pieces then dried. The result is a light, crispy texture and never grainy!
By slicing the chicken breasts to about 1cm/half an inch, they pretty much are cooked once both sides turn golden on medium-high heat. Otherwise, test a piece by cutting the chicken and if the flesh is white (not pink) then it's done.
On the flip side - make sure you keep both eyes on the chicken. Over frying will dry the chicken out!
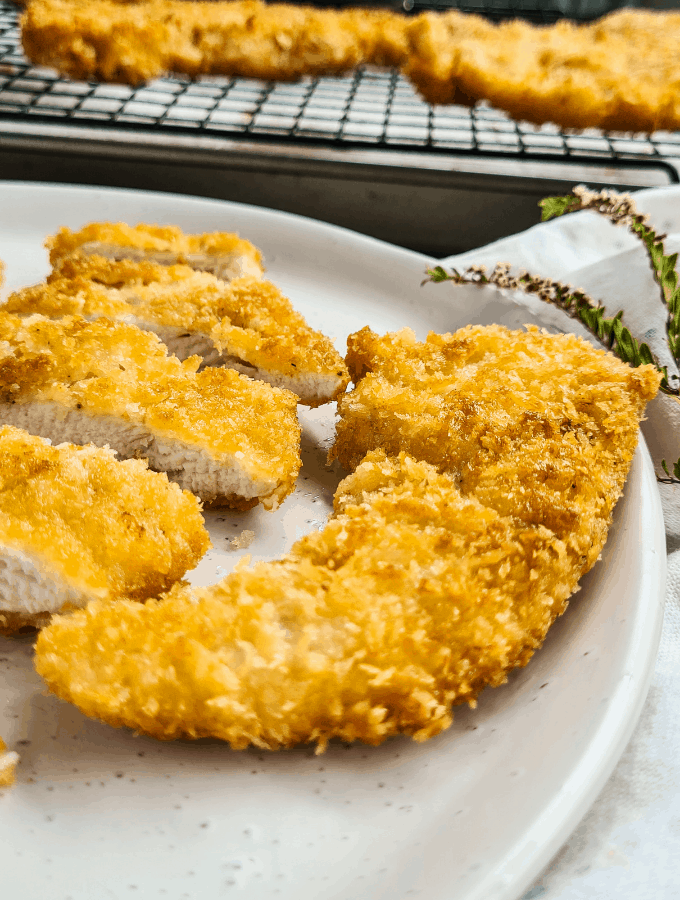
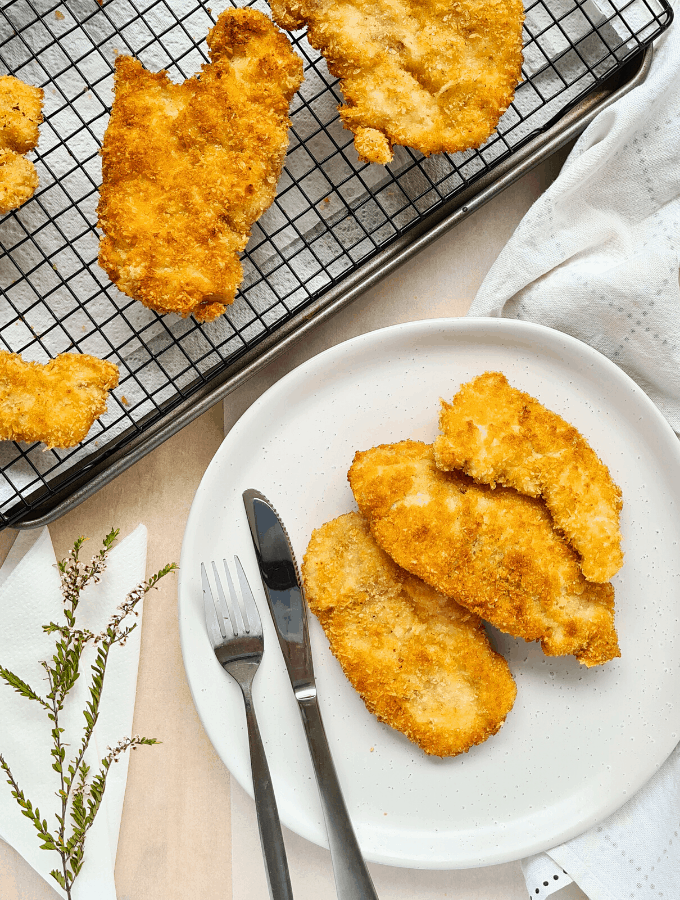
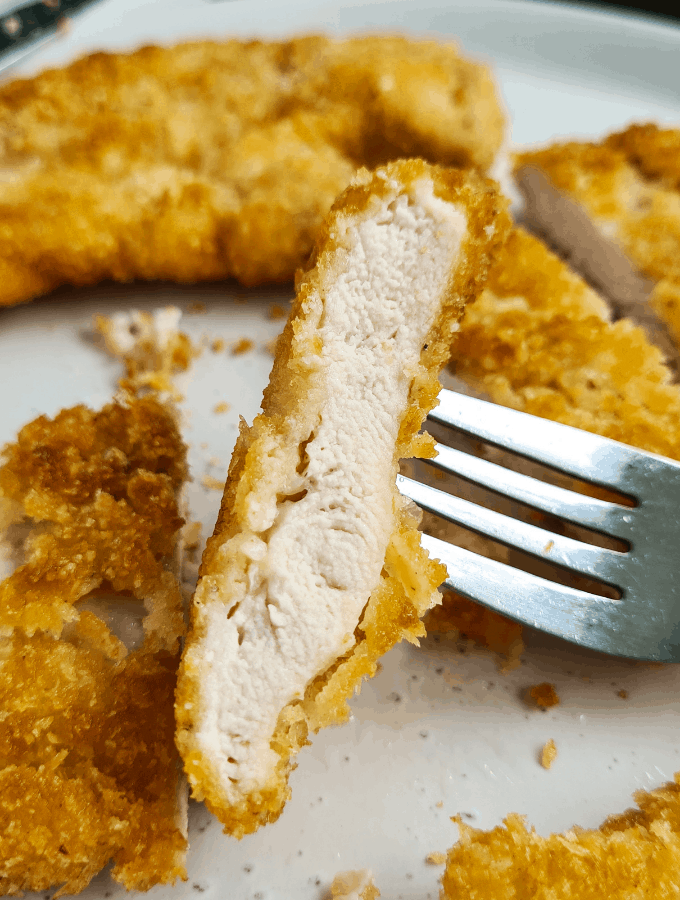
See how crispy and flaky the coating is? So good!
Serving suggestions
I like to keep it simple when serving panko chicken schnitzel. On its own or with a little freshly grated parmesan cheese, a squeeze of fresh lemon juice and a side of simple salad.
Alternatively, serve with your favourite sauce - tomato sauce/ketchup, BBQ sauce, thick gravy, creamy mushroom sauce, creamy lemon sauce, creamy mustard sauce or just creamy anything is generally a good idea!
Make it into a sandwich with some shredded lettuce and spicy mayonnaise. Pimp it right up and turn it into chicken parmigiana. The possibilities are endless!
Made this recipe? Let me know your thoughts or questions by dropping a note in the comments section below! I'd love to hear from you. 🙂
If you're active on Instagram, take a picture once you've made this recipe and tag me on Instagram! I'd love to see them!
Happy cooking! - Gen
📖 Recipe
Panko chicken schnitzel
Ingredients
- 2 large chicken breasts about 420g/16oz
- 2 cup panko breadcrumbs normal breadcrumbs are okay too
- ½ cup plain flour
- 2 eggs whisked
- frying oil canola, sunflower or olive oil are all okay
- salt and pepper
Instructions
- Slice chicken breasts horizontally (or pound) to about 1cm/½inch thick.
- Season chicken with salt and pepper.
- Pour enough oil (for shallow frying) into a skillet or heavy-based frying pan. Preheat the oil on medium-high heat. (note 1)
- Set up a coating station - 1 shallow bowl (or deep plate) for the eggs, 1 for the panko and 1 for the flour.
- Using a pair of tongs, coat a slice of chicken breast with flour. Shake off excess flour then dip and coat with whisked eggs. Finally, coat with panko breadcrumbs. Make sure the entire piece of chicken is completely coated by all 3 ingredients each step of the way.
- Repeat for all chicken slices.
- Shallow fry coated chicken pieces in 2 batches, on medium-high heat. Flipping only once. (note 2)
- Once both sides are golden, the chicken should be done. Test by cutting a piece if not sure. If the flesh is white then it's ready.
- Rest panko chicken schnitzel pieces on a cooling rack for 5 minutes before serving.
Carol
Although I have fried chicken breast meat many times, I like the idea of slicing it thinly like you've done here. Since the chicken cooks incredibly fast, we don't need to spend lots of time in the kitchen. Then we can move on to the fun part...eating it! I can't wait to have this for dinner tonight! Thanks for sharing.
Genevieve
I'm so glad to hear Carol! Happy that I can help with cutting down your cooking time 🙂 Thank you for your lovely note.
Jackie
Looks great!! Will cook this for dinner!! Yummy!!!
Genevieve
Thank you 🙂 That's awesome to hear!