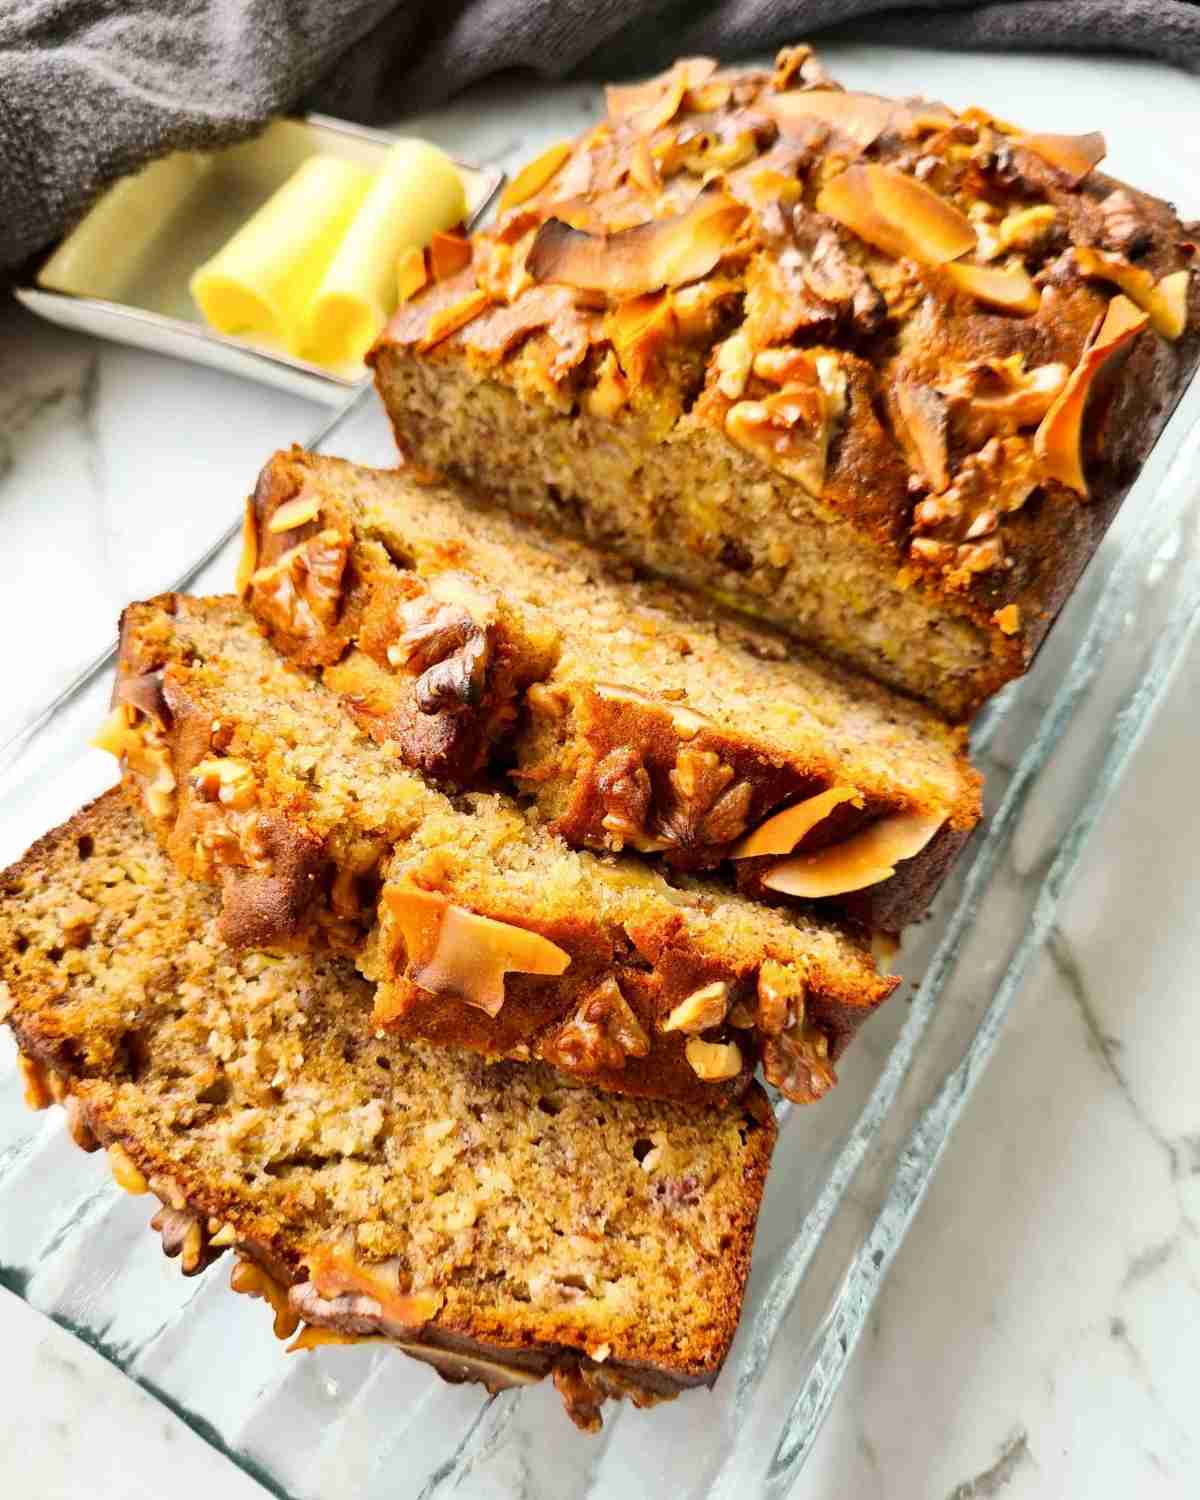
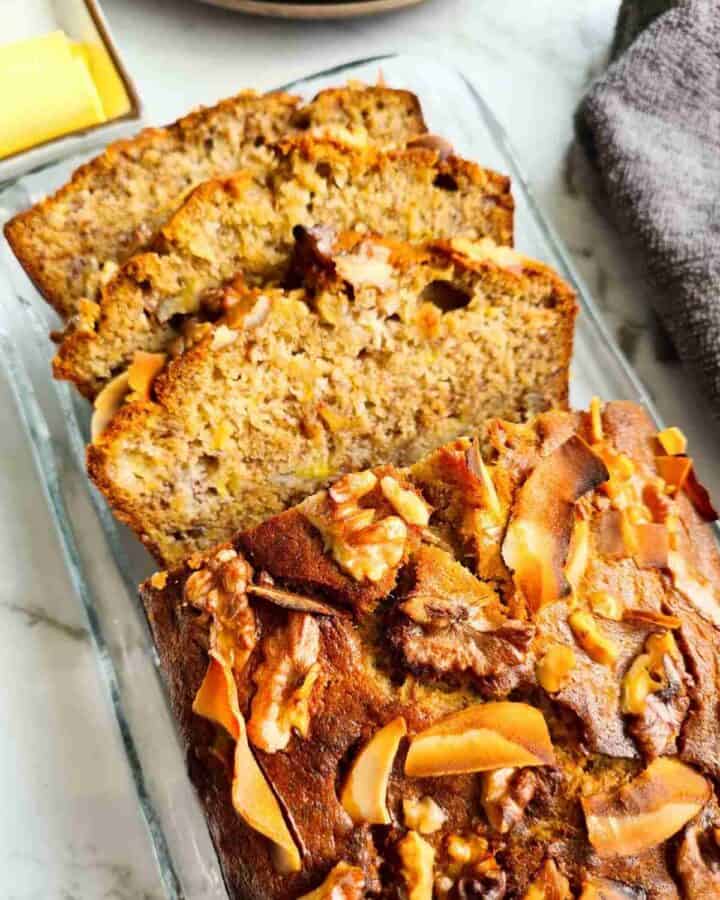
A thick slice of toasted banana bread slathered with a generous layer of salted butter is hard to resist. Even harder when it's coming straight out of the oven smelling oh so heavenly!
This banana bread recipe has all the good stuff that we know and love; moist, sweet, decadent and comforting. But it doesn't stop here. This one also possesses sweet notes of honey, crispy coconut flakes and roughly chopped walnuts weaved throughout.
It does not take any longer than a classic recipe but this one definitely will look fancy!
Jump to:
Ingredients
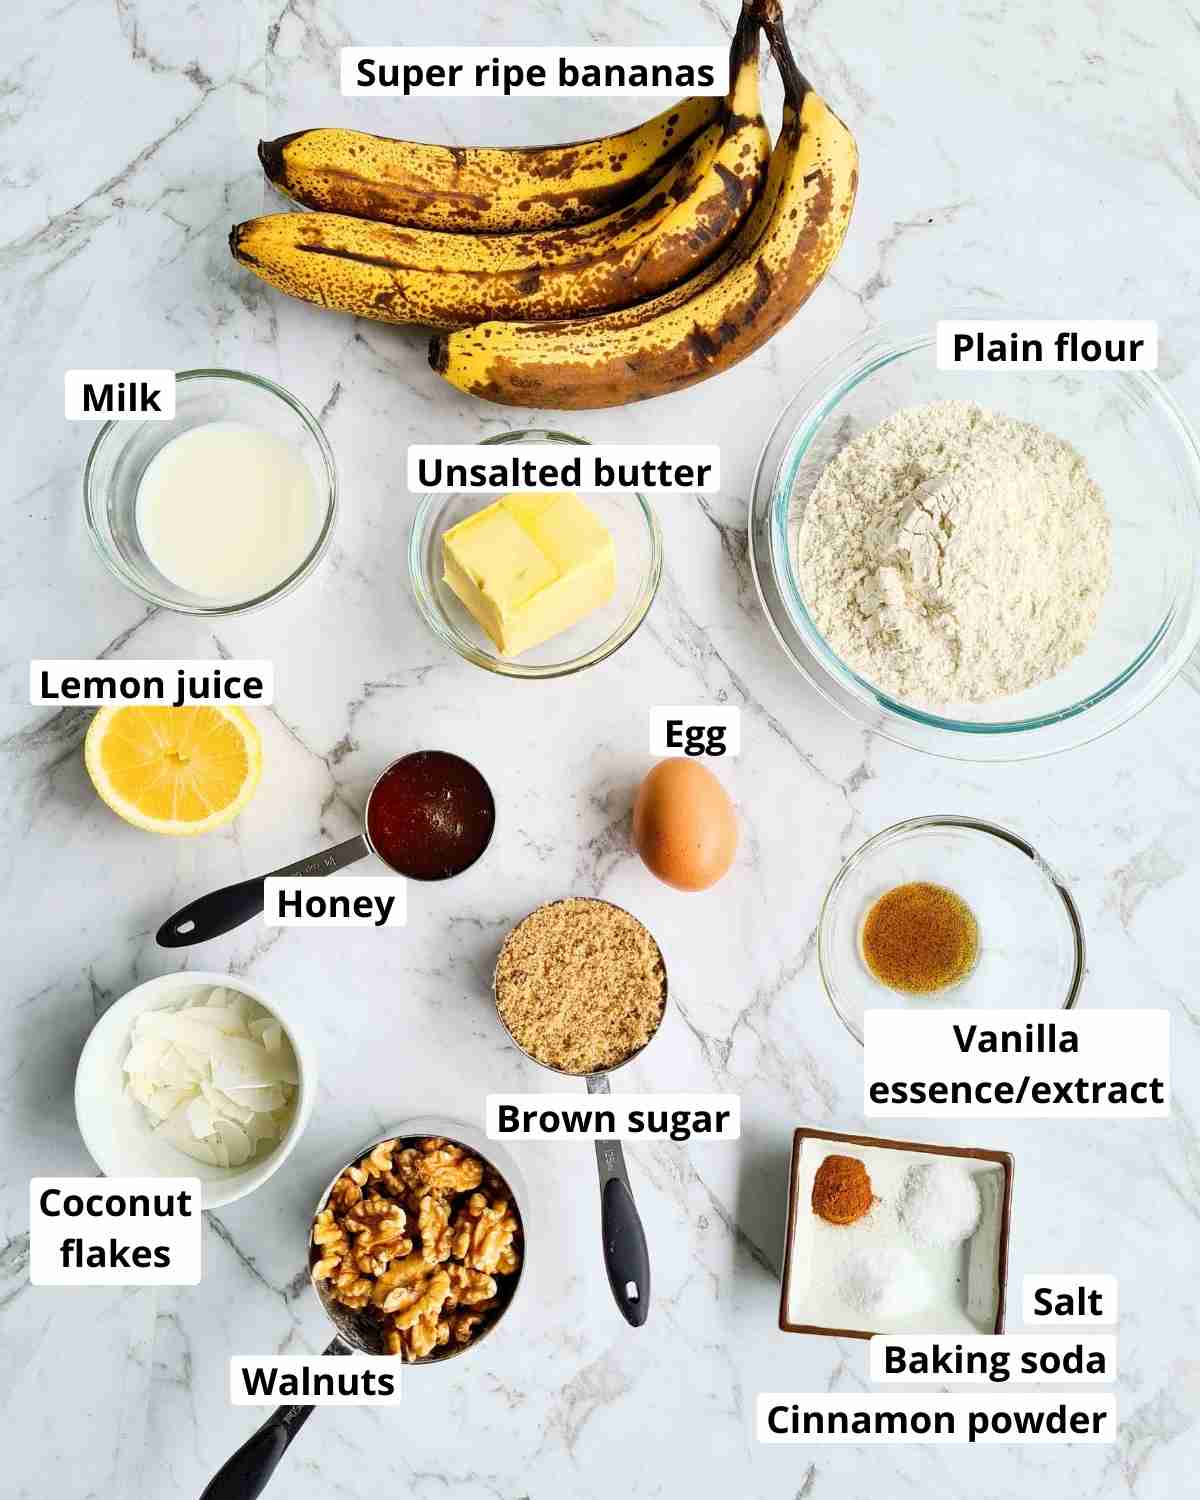
- Super ripe bananas - very important! You want the ones that have all the brown spots/patches all over as that's when bananas are sweetest.
- Brown sugar - I always prefer this over caster sugar as the molasses in dark brown sugar add depth of flavour.
- Vanilla essence/extract - adds aroma and enhances the flavours of all other ingredients here. Without it, you'll find the banana bread will taste a little flat and even get the feeling that something's missing but can't grasp why.
- Milk + lemon juice - my trick to getting the bread super moist! The extra acidity from the lemon juice works perfectly with bicarb soda, ensuring the bread comes out fluffy and never dense! Substitute: store-bought buttermilk or Greek yoghurt.
- Walnuts - adds a nice crunchy texture and a welcoming layer of mild, earthy flavour. Not a fan? Try pecan nuts or leave it out completely.
- Coconut flakes - adds a delicious aroma, nutty flavour and also crunch!
- Plain flour - can substitute with self-raising flour and if doing so, exclude baking soda.
- Baking soda (aka bi-carb soda) - not to be confused with baking powder! Baking soda is a lot stronger. If using baking powder, swap baking soda with 1.5 teaspoons of baking powder for this recipe.
Step-by-step instructions
One of the great things about banana breads is that it's super easy to make. This recipe is no different.
Make the batter
To begin, preheat the oven to 180°/350°F.
In a large mixing bowl, peel then mash bananas with a fork.
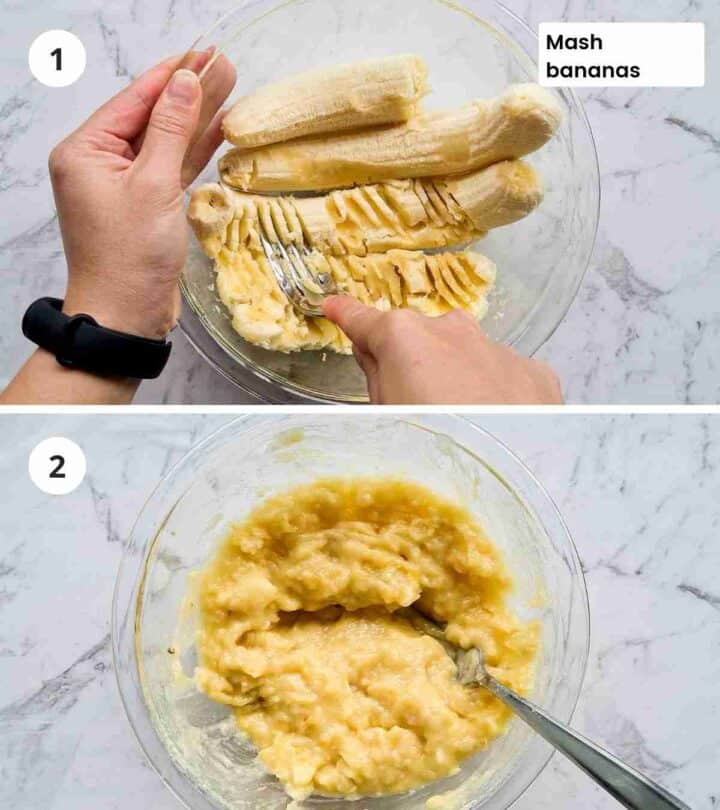
Mash the bananas until there are no more large chunky bits, as smooth as possible. Don't sweat if it isn't super smooth, a thick paste consistency like the picture above is good enough. Set aside.
Now, make the homemade buttermilk. It's super easy and simple. Just combine milk with a squeeze of fresh lemon juice.
The milk will curdle almost instantly, give it a quick mist with a spoon and set it aside.
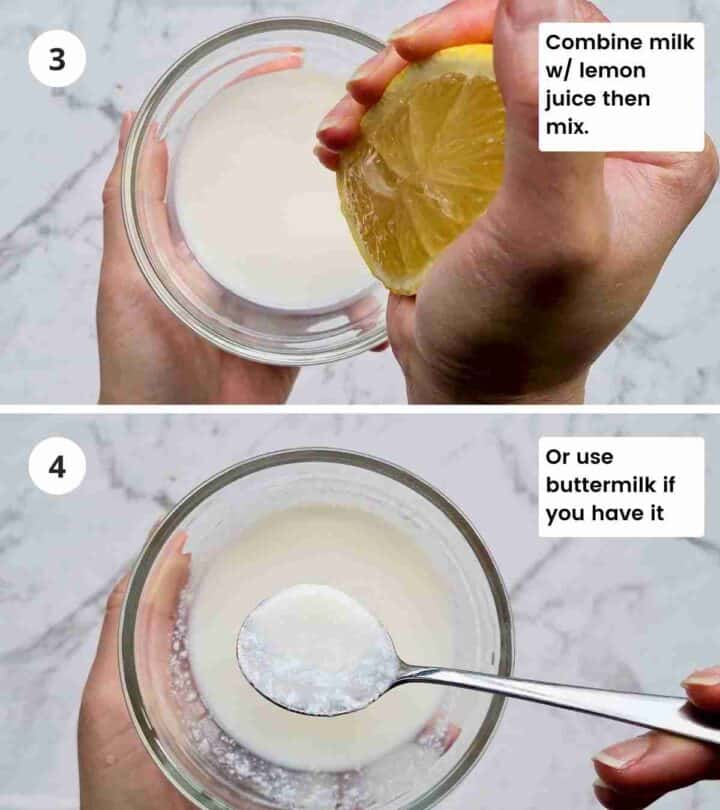
You can substitute this step with using store-bought buttermilk or Greek yoghurt.
The acidity from the lemon juice (or yoghurt, if using) and bananas reacts brilliantly with the bicarb-soda and is key to getting the banana bread nice and fluffy.
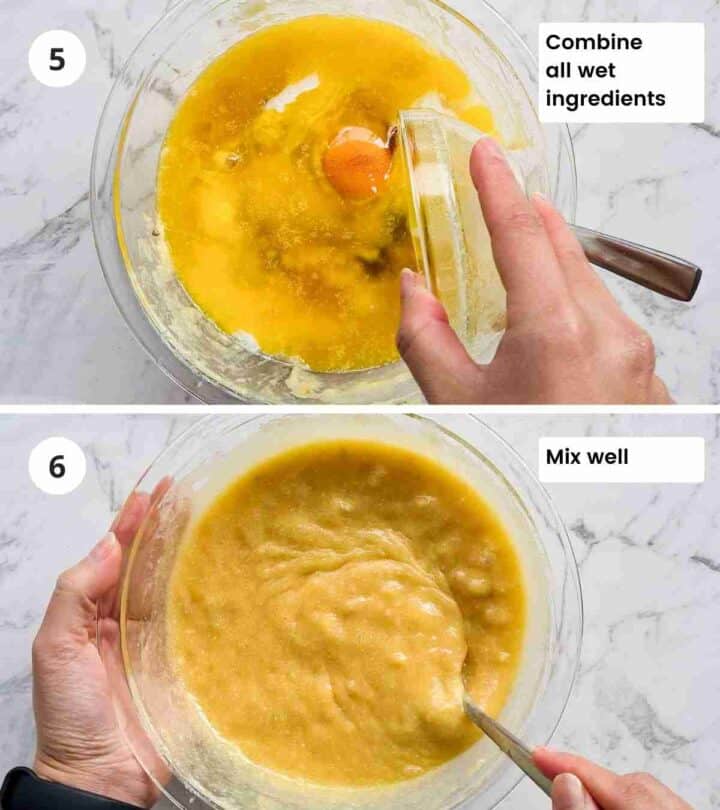
Next, add melted butter, egg, vanilla essence, honey and lemon milk into the bowl of mashed bananas.
Mix well with a fork until well combined.
In a separate large bowl, combine flour, bicarb soda, salt, brown sugar and cinnamon powder. Mix well with a large wooden spoon or a silicone spatula.
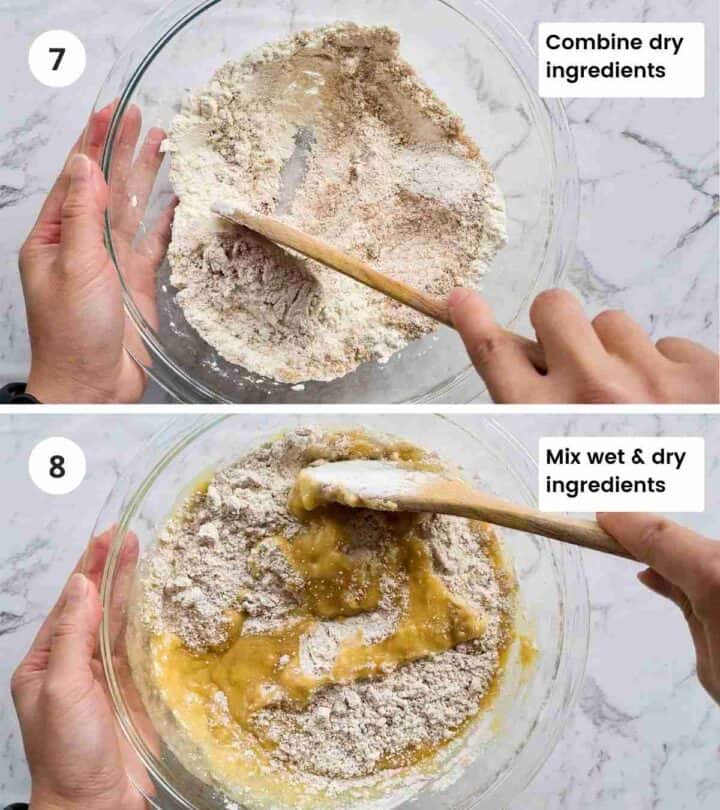
Pour the flour mixture (dry ingredients) into the bowl filled with the banana mixture (wet ingredients).
Gently mix the batter until just combined with a wooden spoon and there are no more dry pockets.
Bake
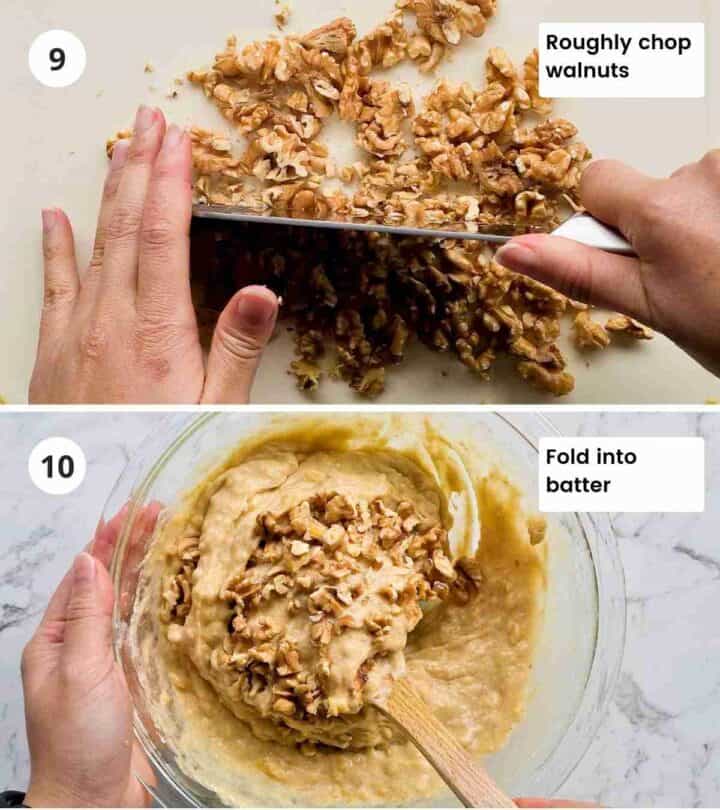
Roughly chop walnuts (or pecan nuts) then fold roughly ½ of it into the batter.
Pour the batter into a lightly greased bread loaf tin. Even the batter out with a spoon so the bread will rise evenly.
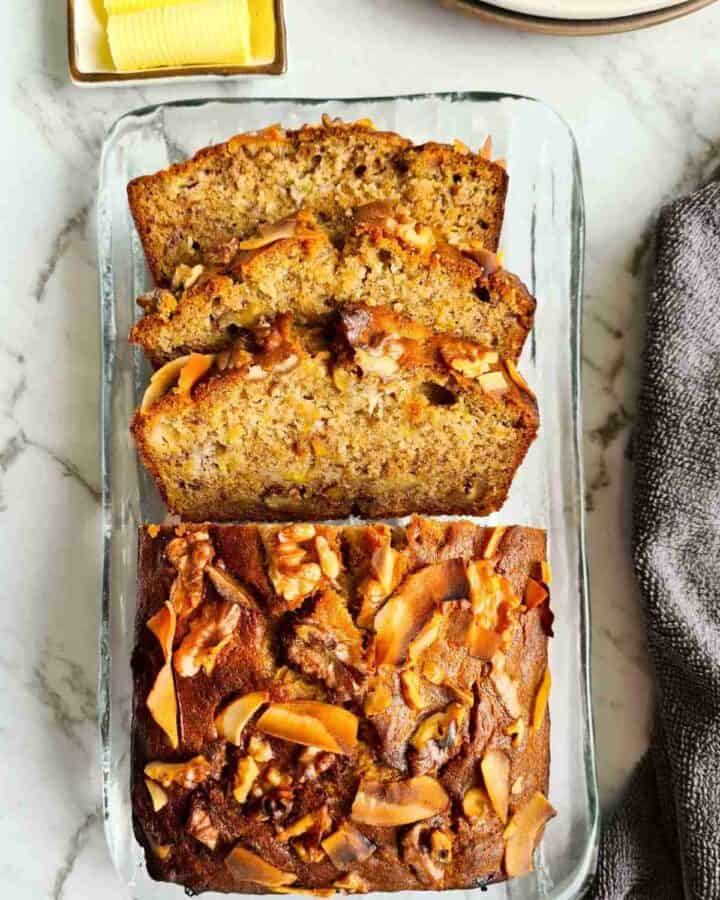
Sprinkle the top of the batter with the remaining chopped walnuts and coconut flakes. Gently push down the walnuts and coconut flakes with a finger so that they stick to the batter (and won't fall off of the bread once baked).
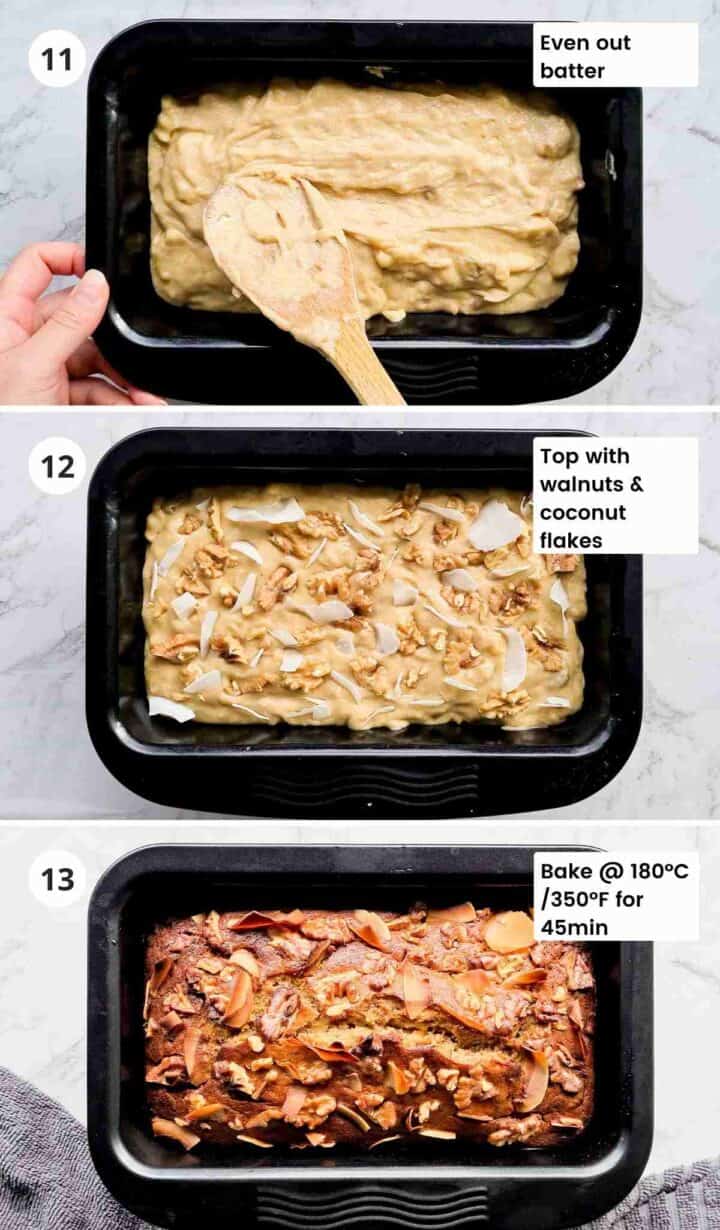
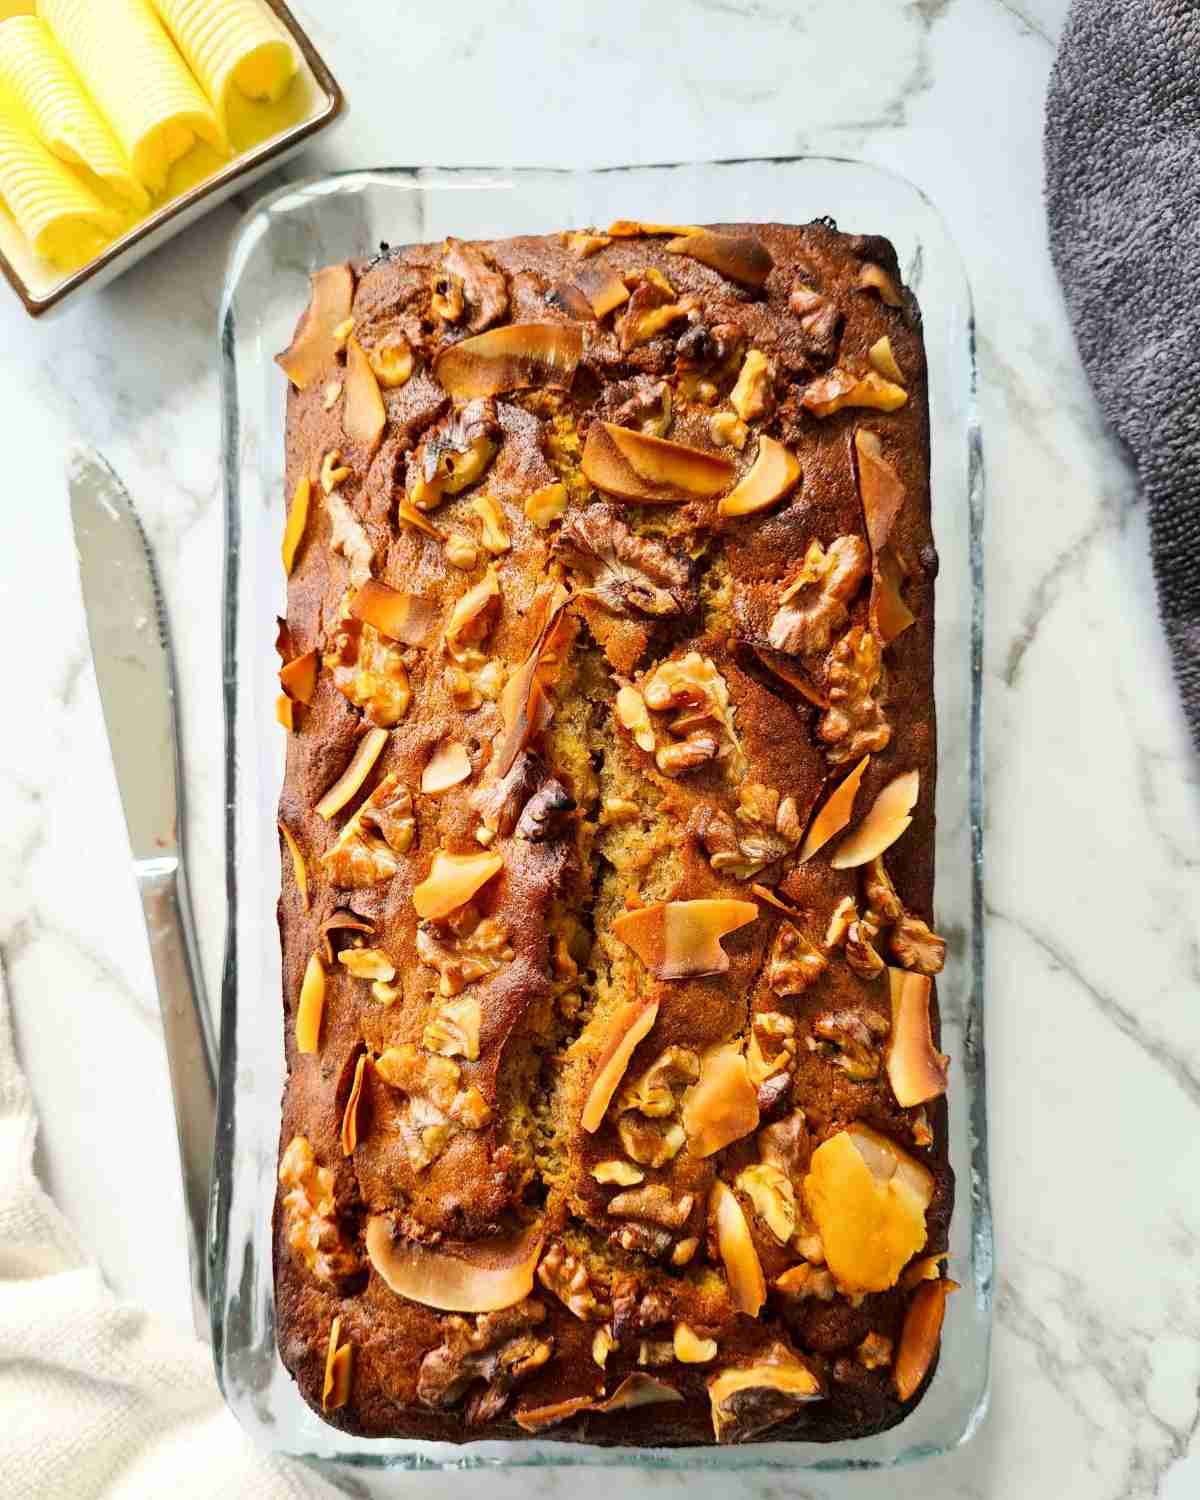
Bake for 45 minutes or until a skewer comes out clean when pierced.
Rest for 10 minutes in the tin once it's out of the oven before turning it out onto a cooling rack to completely cool.
As tempting as it will be, avoid slicing the loaf whilst it's still hot. Hot banana breads are hard to slice and can easily break apart when slicing (guilty!)
Just like lasagna, you've got to let it rest before slicing!
Serving suggestion
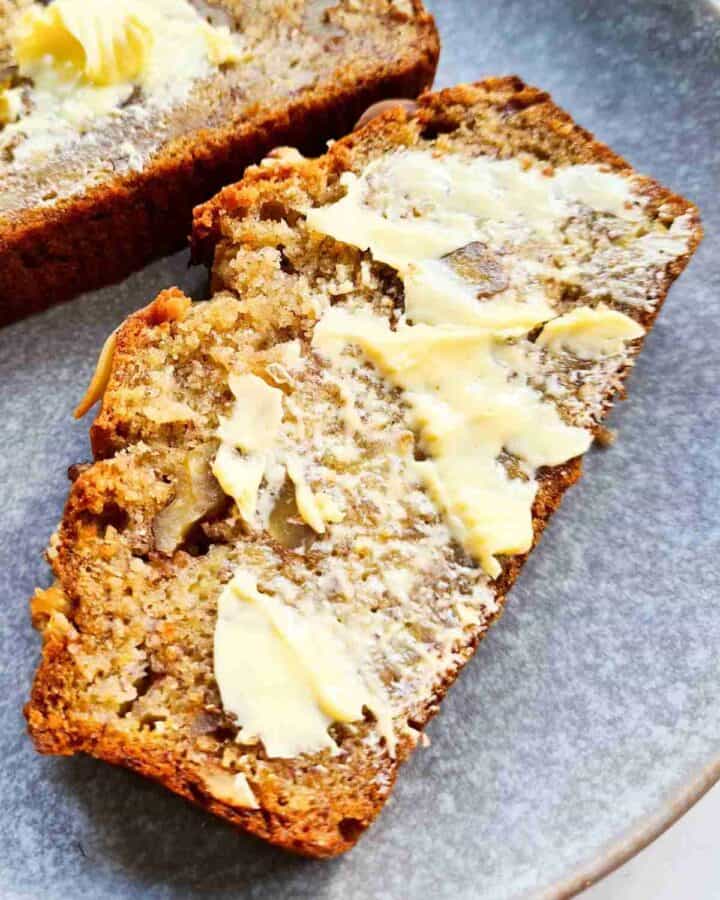
The best way (IMHO) to serve a thickly sliced banana bread is to toast it in a sandwich press or a toaster then spread it with a layer of salted butter. YUMMM!
No salted butter? Just use unsalted butter then sprinkle a little salt on top. Just a tiny bit is enough to further enhance the flavour of this humble bread.
Otherwise, toasted without butter is equally delicious; moist, fluffy, indulgent and delicious smelling!
There are no rules, serve as breakfast, afternoon tea or after dinner dessert with a cup of coffee or tea. Vanilla ice cream? Heck yeh!
Useful tips and tricks
- To speed up the ripening process of bananas - store bananas in a paper bag and loosely close. Otherwise, just wait a few more days as it's well worth the wait! Either way, keep the bananas away from the fridge. If you have an apple or a ripe banana, put it together with the bananas and that'll also help.
- Use a thin wooden skewer to check for doneness - depending on your oven, cooking time may vary. If the skewer comes out clean (when pierced in the centre of the bread) that means it's cooked. If not, pop the bread back in the oven and check every 5 minutes after the suggested cooking time of 45 minutes.
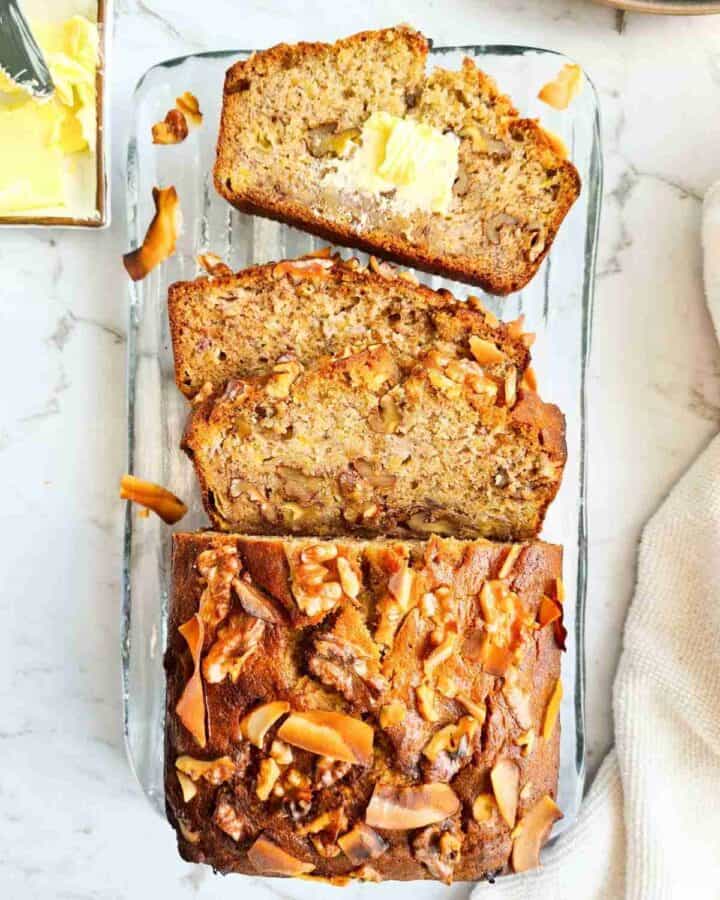
- Slice the bread when it's cold - this will guarantee a clean, perfect slice. I've been there, got too eager and sliced the bread when it was still quite warm. It got messy real quick! Patience is key.
- Slice with a serrated bread knife - this is particularly handy when the banana bread is still hard/crunchy on the outside (ie, less than a day old). Once it's been in the fridge overnight, the outer layer will soften and any kitchen knife will work well.
Good to know
You can but I'd avoid it. Bread flour has higher protein content compared to plain flour which creates more gluten. More gluten means the structure of the bread will hold, rise nicely (with yeast) and have a good chewy texture. This chewy texture isn't ideal for banana breads as they're best when fluffy and moist. Stick to plain, all-purpose flour.
It will take longer to bake and the bread will not rise as high. For this recipe, stick to 3 bananas in the range of ~500-550g/1-1.2 pounds with skin on.
Yes, replace baking soda with 1.5 teaspoons of baking powder to make this banana bread recipe.
Storage/leftovers
Store in airtight containers for up to 7 days in the fridge and up to 3 months in the freezer.
Freezing tip - slice the banana bread then put the whole loaf into an airtight container or freezer-friendly bag with each slice separated by a piece of baking paper (aka parchment paper).
This way it'll be nice and easy to take a slice or two out whenever cravings casually strike!
Made this recipe? Let me know your thoughts or questions by dropping a note in the comments section below! I'd love to hear from you. 🙂
Happy cooking!
- Gen
📖 Recipe
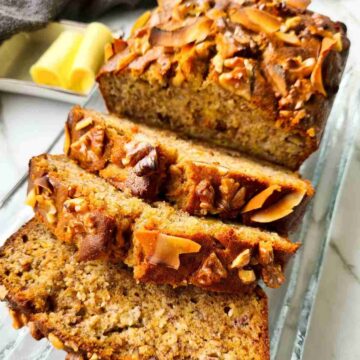
Banana Bread with Walnuts and Coconut Flakes
Ingredients
- ½ cup walnuts roughly chopped, substitute: pecan
- ¼ cup coconut flakes
Dry ingredients
- 1½ cup plain flour
- ¾ cup brown sugar
- ½ teaspoon baking soda substitute: 3 teaspoon baking powder
- ½ teaspoon salt
- ¼ teaspoon cinnamon powder
Wet ingredients
- 3 large super ripe bananas ~500-550g/1-1.2 pounds with skin on
- ½ cup unsalted butter melted
- 1 egg
- ¼ cup honey
- 1 teaspoon vanilla essence or vanilla extract
- ¼ cup milk (note 1) for substitute
- 1 teaspoon lemon juice (note 1) for substitute
Instructions
- Preheat oven to 180°C/350°F.
Prepare the wet ingredients
- Make the buttermilk: in a small cup, combine milk with lemon juice. Swirl the cup for 5 seconds then set aside. It'll curdle almost instantly.
- In a large mixing bowl, peel then mash bananas with a fork until smooth (small lumps will be inevitable).
- Combine all wet ingredients into the mixing bowl with mashed bananas, including the buttermilk. Mix well with a fork until well combined.
Prepare the dry ingredients
- In a large mixing bowl, combine all dry ingredients. Mix with a wooden spoon until well combined.
Combine then bake
- Pour mixed dry ingredients into the wet ingredients. Mix with a wooden spoon until the batter is smooth.
- Fold in ½ of walnuts into the batter. Pour batter into a lightly greased loaf tin.
- Top the batter with coconut flakes and remaining walnuts. Gently press the flakes and walnuts into the batter to secure their positions.
- Bake for 45 minutes or until a skewer comes out clean when pierced (note 2). Rest the banana bread for 10 minutes in the tin once it's out of the oven before turning it out onto a cooling rack to completely cool. Thickly slice then serve.
- Best serve toasted then spread with salted butter!
Leave a Reply